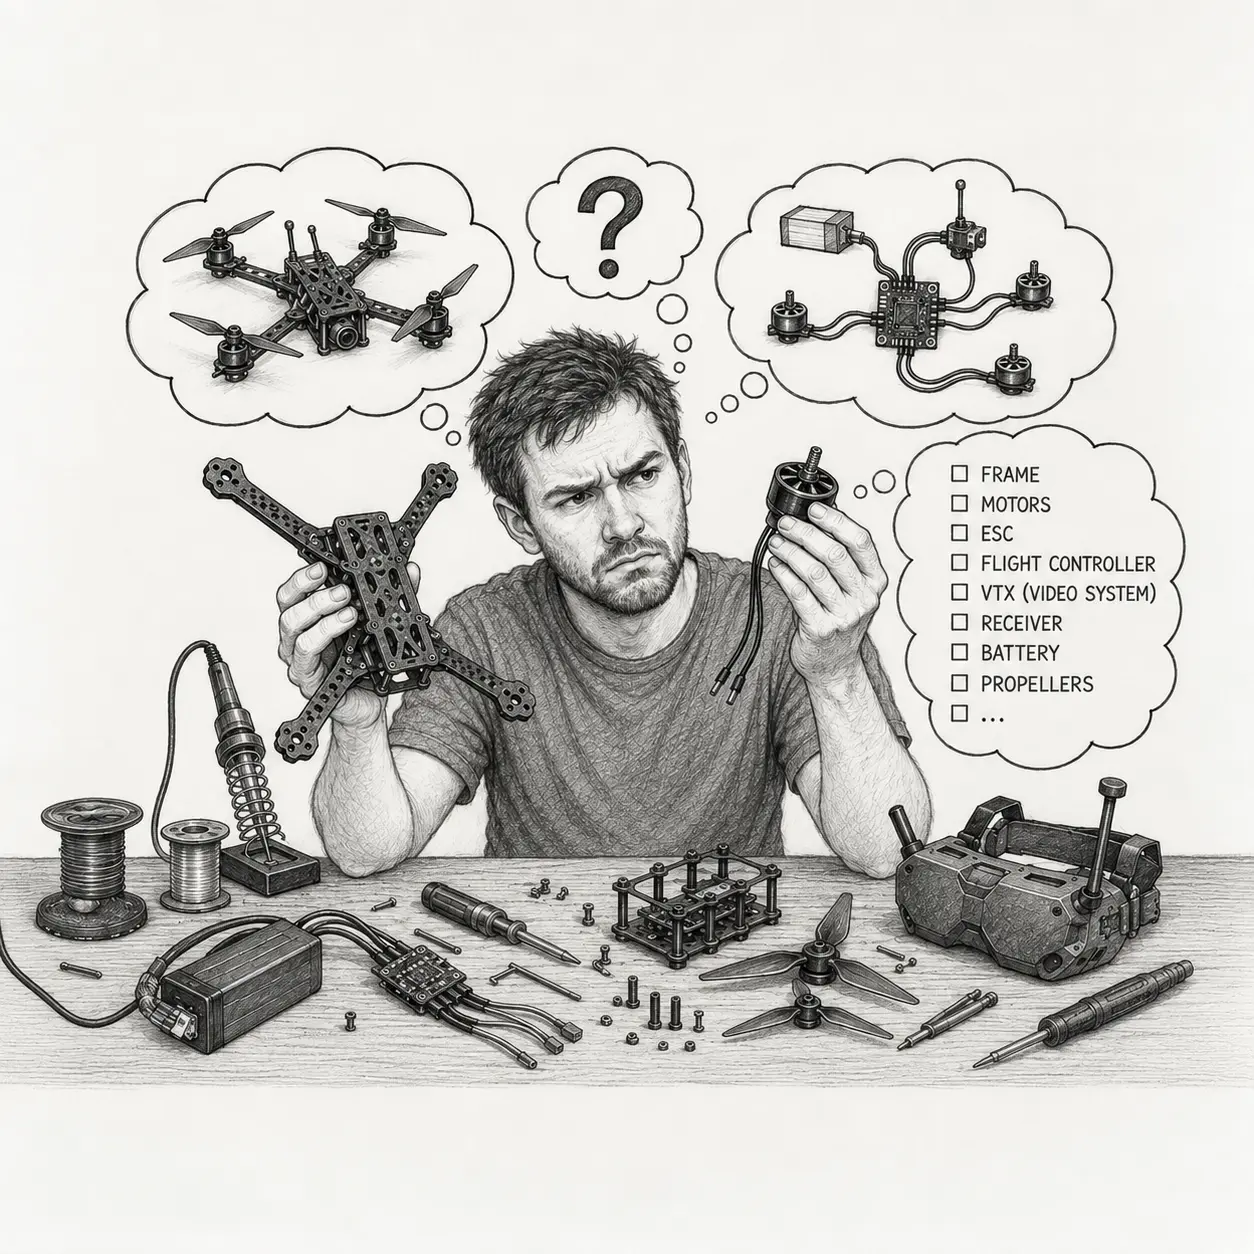
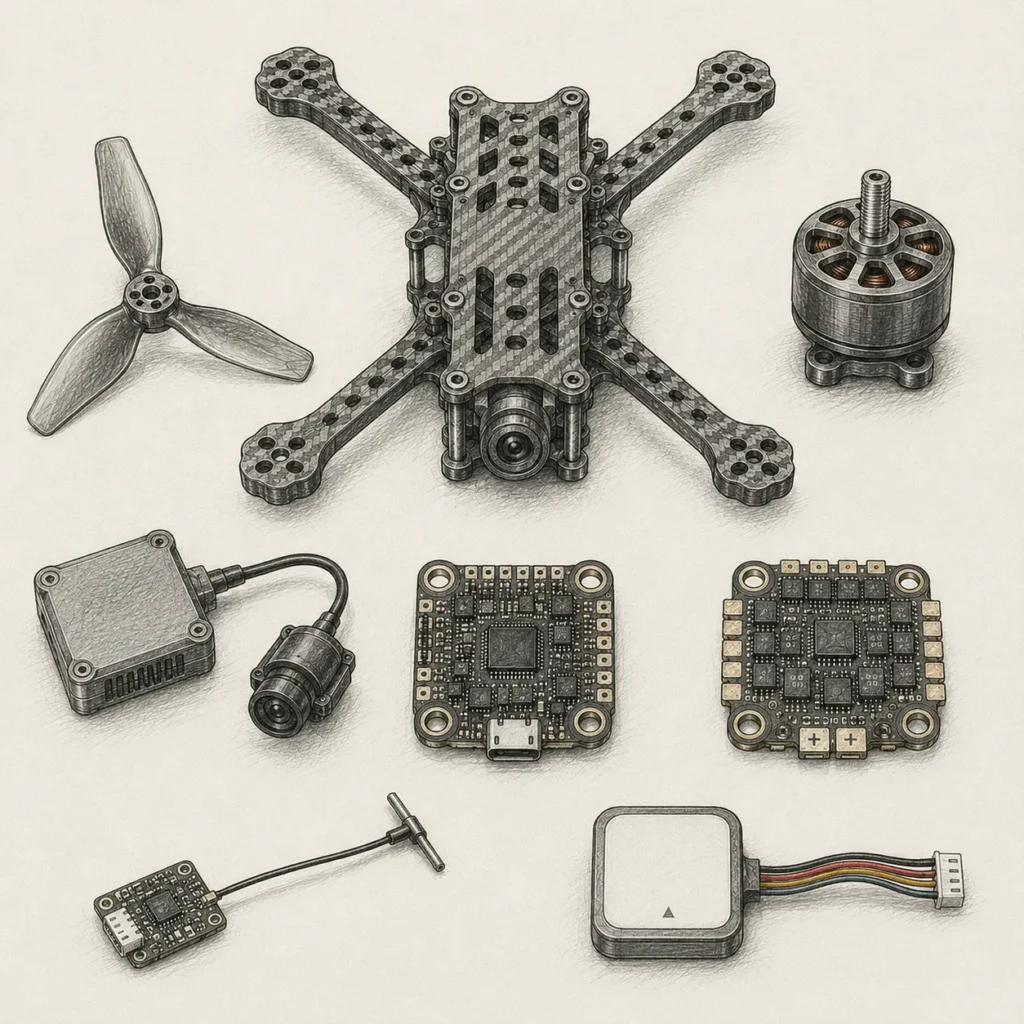
Now that we know the different types of FPV drones, let’s build one. Or at least, let’s first get familiar with the main FPV drone parts you’ll need to build almost any type of FPV drone.
It’s not rocket science, but it does take some time to wrap your head around how all the parts connect and work together. There’s a lot to cover — so let’s dive in.
Table of Contents
FPV drone component list
Knowing the anatomy of an FPV drone isn’t mandatory, but to be fair, I can’t imagine getting very far in this hobby without at least a basic understanding of its main components.
One of the more interesting things about the FPV hobby is the ability to build a drone yourself. Unlike most camera drones (DJI, Autel, Parrot, and others), FPV drones are often assembled from individual components. This not only helps you better understand how the drone works, but also gives you the freedom to customize it for your specific needs: freestyle, cinewhoop, long range, or racing.
At first glance, an FPV drone might look like nothing more than a frame, four motors, and a camera. In reality, things are a little more complicated — but not so complicated that anyone willing to give it a try couldn’t figure it out.
Below, I’ll go through the main FPV drone parts and explain what each one does.
Frame
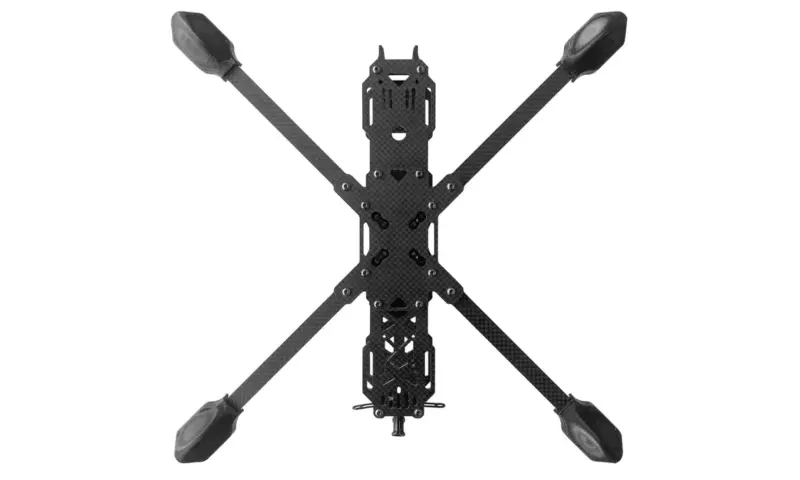
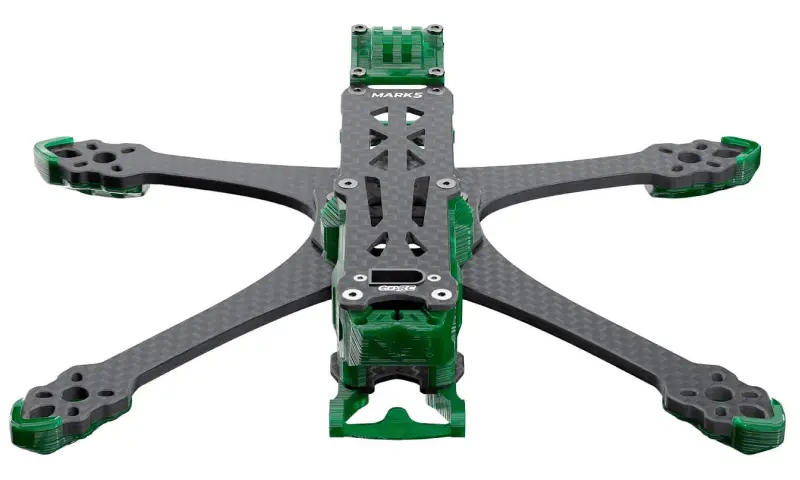
The frame holds the drone’s electronics, camera, antennas, and battery. Most FPV drone frames are made from carbon fiber because it’s lightweight, very strong, and good at absorbing vibrations generated by the motors.
Frames come in various sizes and shapes. Some of the most common are:
- X-shaped;
- dead-cat;
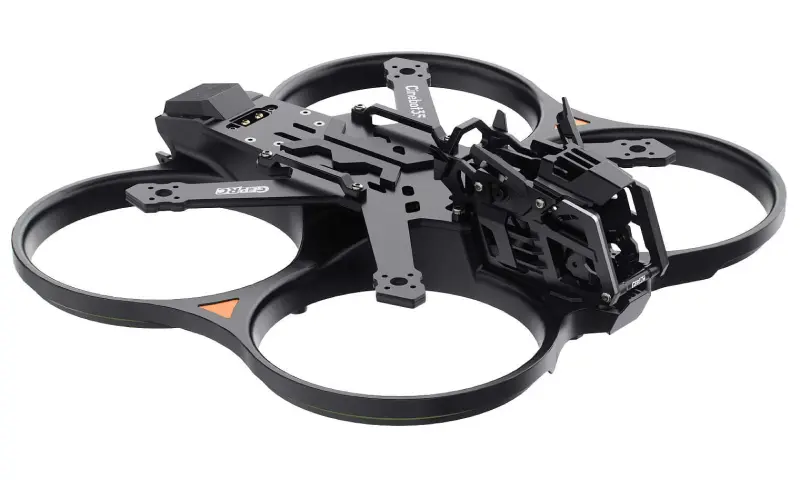
- frames with propeller guards;
- cinematic;
- long range.
Personally, I usually start a drone build by choosing the frame. First, I need to answer one question: where and how do I want to fly? Freestyle? Long range? Maybe racing? Once I know that, I choose the propeller size. Each frame is designed for a certain propeller size. Then I decide which video system I’m going to use (some use one antenna, others two). Some video modules are quite small, while others can take up half of the available mounting space.
If I were planning to record cinematic footage directly with the drone’s camera and wasn’t going to use a separate action camera (like a GoPro or DJI Osmo Action), I would most likely choose a dead-cat frame. The funny name came about because someone thought the shape looked like a sprawled-out cat: the front “shoulders” are wider, while the rear ones are narrower. The main advantage of this type of frame is that the propellers stay out of the camera’s view.
When building your first drone, which will almost certainly have its fair share of crashes into gates, trees, or even poles, it’s worth considering a frame with propeller guards. These frames not only provide better protection for the propellers themselves, but also reduce the risk of injuring someone or damaging objects around you.
If you’re new to electronics, soldering, and similar “magic” like I am, I’d suggest starting with at least a 3.5-inch drone — or, even better, a 5-inch drone. A lot of people are intimidated by soldering (I certainly was in the beginning), so starting with a tiny drone and trying to solder wires onto equally tiny pads can be quite a challenge.
By the way, my logic here is that the first drone you build shouldn’t be the first drone you fly. A 5-inch drone is a definite NO-GO as the first FPV drone you actually learn to fly.
X shaped frame
DC shape frame
Frame with propeller guards
Motors
As they spin, the motors generate thrust and allow the drone to fly — although, of course, you need a propeller attached to each motor. FPV drones use brushless motors because they are more efficient, powerful, and durable than brushed motors.
Each motor has two main parameters:
- Size (e.g., 2207, 1404, 3115)
- KV rating (e.g. 2050KV)
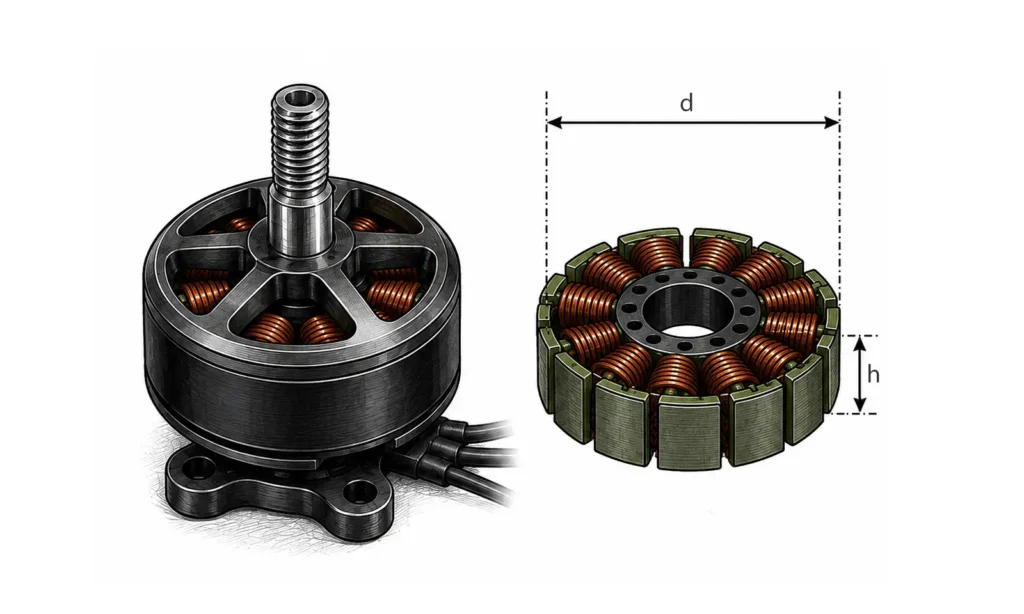
For example, a 2207 motor size means a 22 mm stator diameter (d) and a 7 mm stator height (h). The stator is the stationary part of the motor that contains the windings, around which the magnets rotate. As a general rule, larger motors can produce more thrust, but they are also heavier and consume more power.
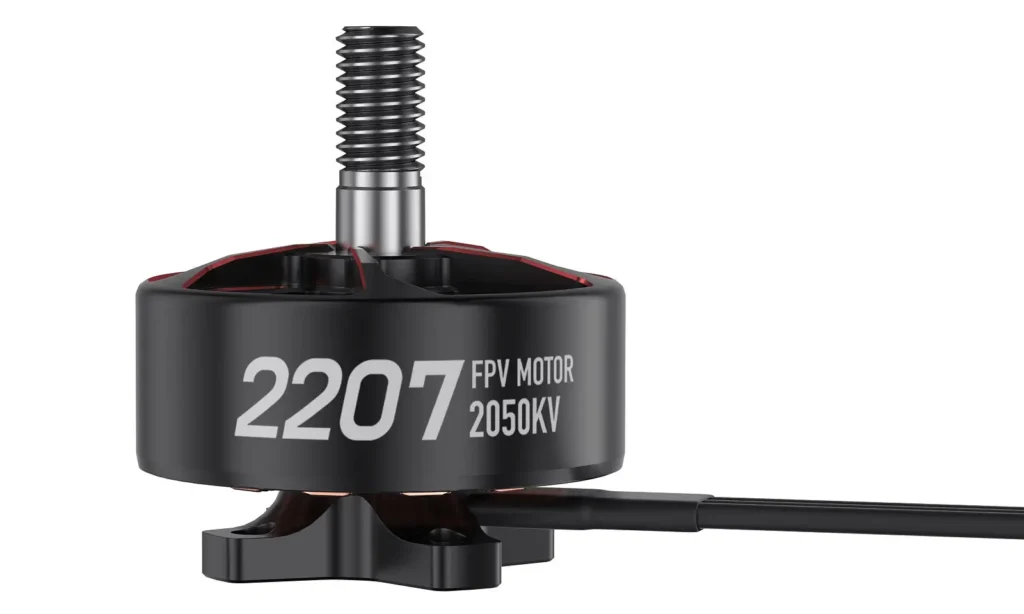
KV does not mean kilovolts. Instead, it indicates how many revolutions per minute (RPM) a motor would theoretically make per volt with no load. For example, a 2050KV motor supplied with 1V would theoretically spin at 2,050 RPM. In reality, however, a propeller creates a load on the motor and reduces the actual RPM during flight. Lower-KV motors are generally more suitable for larger propellers or higher-voltage batteries and can be more efficient in those applications. Higher-KV motors, on the other hand, are more aggressive, can produce more power, and demand more current. Using a KV that is too high for the setup can overheat the motors and reduce energy efficiency.
Once you’ve chosen the frame size — which means you already know the propeller size — your choice of motors depends on your intended flying style and battery. I highly recommend Oscar Liang’s article on choosing FPV motors; it’s one of the best resources for both beginner and advanced FPV pilots. Whenever I choose a motor, I still double-check my choice against this article (just in case).
Propellers
Propellers have a huge impact on flight characteristics. Sometimes, simply switching to a different propeller model can make your drone feel like a completely different drone.
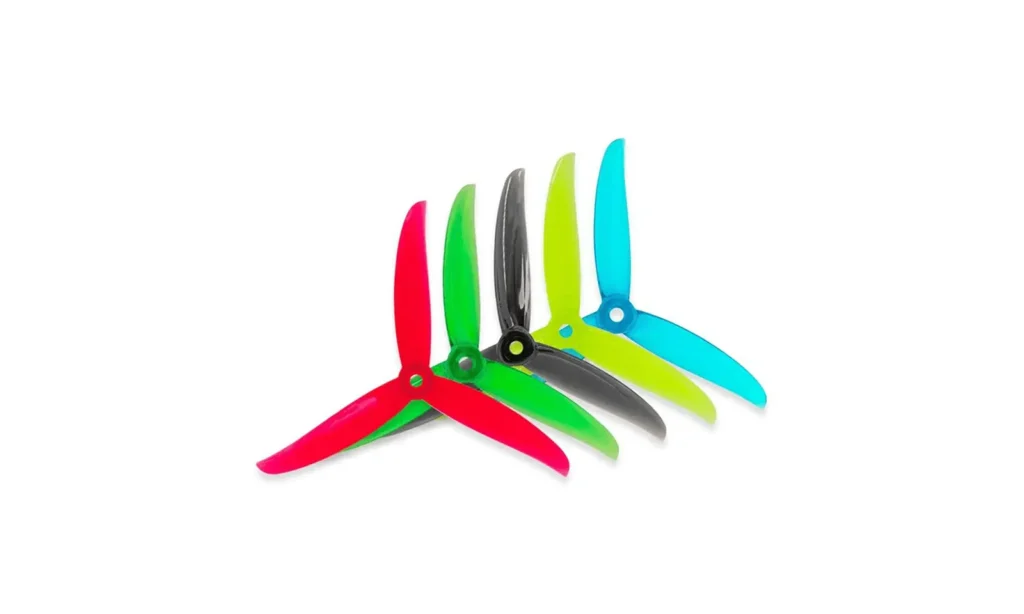
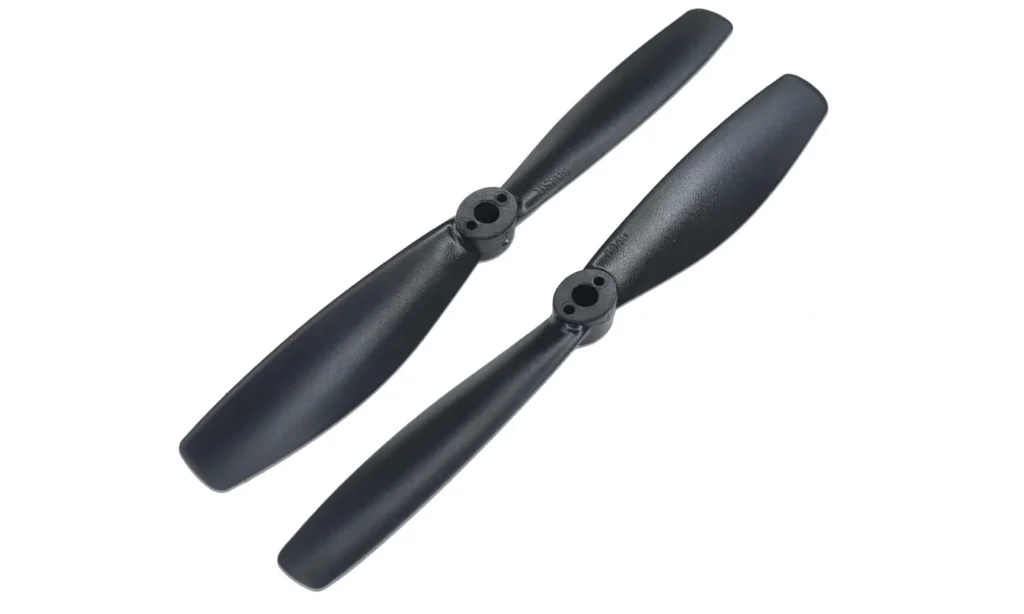
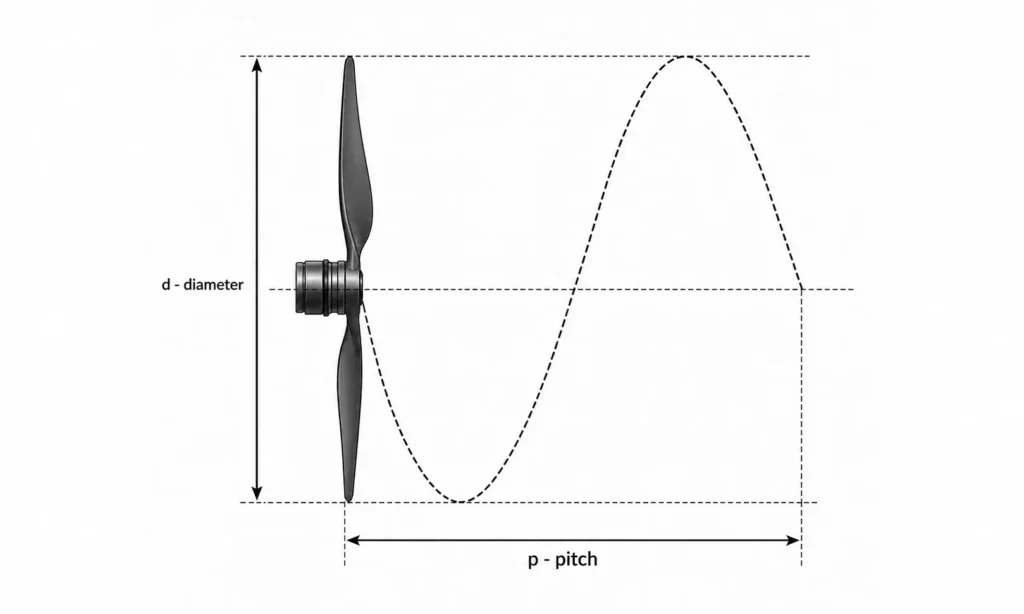
Propellers are described by their diameter (d), pitch (p), and number of blades. Propeller model names often contain numbers where the first indicates the diameter and the second indicates the pitch. For example, “Gemfan 5155 PC 3 Blade” indicates a 5.1-inch diameter, a 5.5-inch pitch, and three blades. Another, somewhat more intuitive naming format is “HQProp 5X4.5X3V3,” which indicates a 5-inch diameter, a 4.5-inch pitch, and three blades. V3, if I understand correctly, indicates the version of the propeller.
A higher propeller pitch means more thrust, more aggressive handling, and higher battery consumption. A lower pitch, on the other hand, means better efficiency, smoother handling, and less noise. Freestyle drones most commonly use three-blade propellers because they provide a good balance between control and efficiency.
But what exactly does pitch mean in the context of propellers? It is the theoretical distance a propeller would travel forward during one complete revolution if there were no aerodynamic losses.
Propellers are the drone parts that break most often. Because of this, whenever you order them, it’s always worth getting a few extra sets. Fortunately, they’re also among the least expensive parts of the drone.
3 blade propellers
2 blade propellers
Propeller pitch
P.S. Only recently did I find out that some older Gemfan propellers don’t follow the diameter-pitch naming convention in their model names. Therefore, before buying a propeller, check the datasheet on Gemfan’s website. Don’t blindly trust online stores — they sometimes make the same incorrect assumptions about how the models are named.
Flight Controller • FC
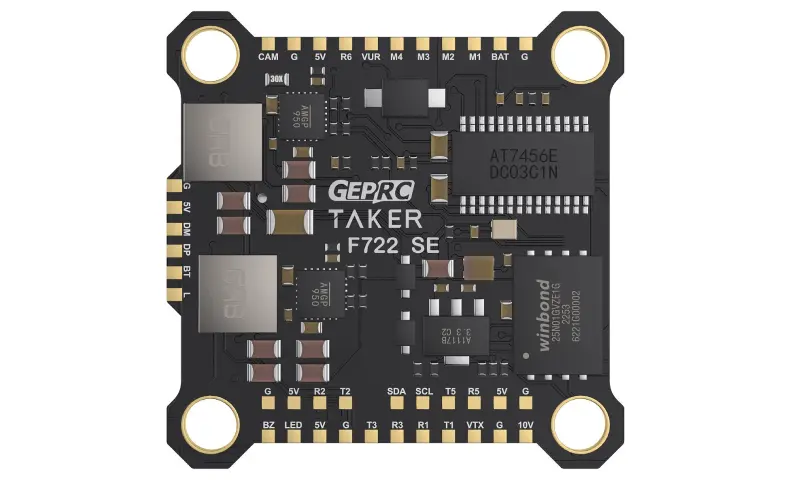
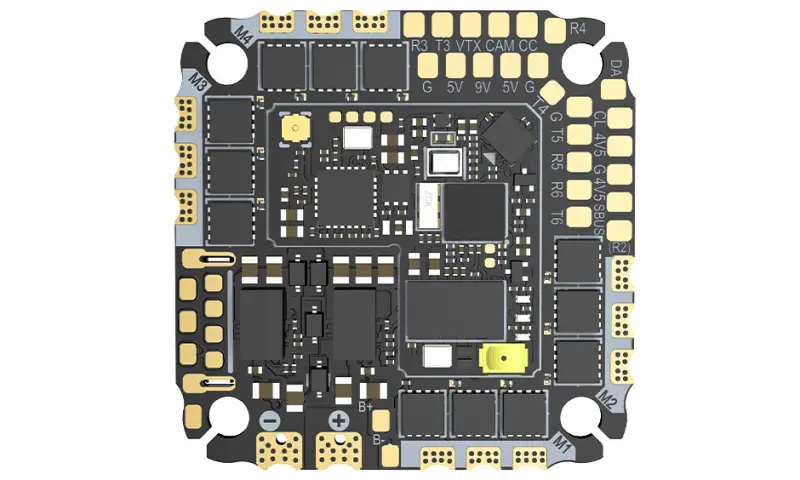
Let’s move on to the electronics. The flight controller, usually referred to simply as the FC, is the drone’s “brain.” It is the main computer running the firmware that controls almost all of the drone’s systems. The FC:
- receives signals from the receiver;
- processes data from the gyroscope;
- calculates stabilization algorithms;
- sends commands to the ESCs;
- coordinates the drone’s entire operation in real time.
It is the FC that allows the drone to fly in a stable and precise manner. The most commonly used firmware includes:
- Betaflight (the most popular choice for freestyle and racing drones);
- INAV (primarily focused on navigation and GPS-assisted flying);
- ArduPilot (a highly advanced platform for professional and autonomous projects).
What would you find on FC?
- Processor — performs all the calculations;
- Gyroscope — determines the orientation of the FC, and therefore the drone, in three-dimensional space;
- UART connections — connections used to connect/solder external modules, such as a GPS module or receiver;
- OSD system — OSD stands for On-Screen Display: a system that adds an additional layer of information over the video feed from the camera;
- Blackbox memory — quite literally an analogy to an airplane’s black box. It stores sensor data recorded during flight, which can later be analyzed using specialized software to adjust and tune the drone’s parameters;
- Barometer — measures air pressure and can use it to determine the drone’s altitude;
- BEC power circuits — essentially mini “transformers”/voltage regulators that convert battery voltage into a lower, stable voltage required by modules connected to the FC, such as 5V or 9V.
On smaller drones, an AIO-type FC is often used. AIO stands for All-in-One. This is an FC that also has the ESC integrated into it. As a result, the functions of both boards are combined on a single board.
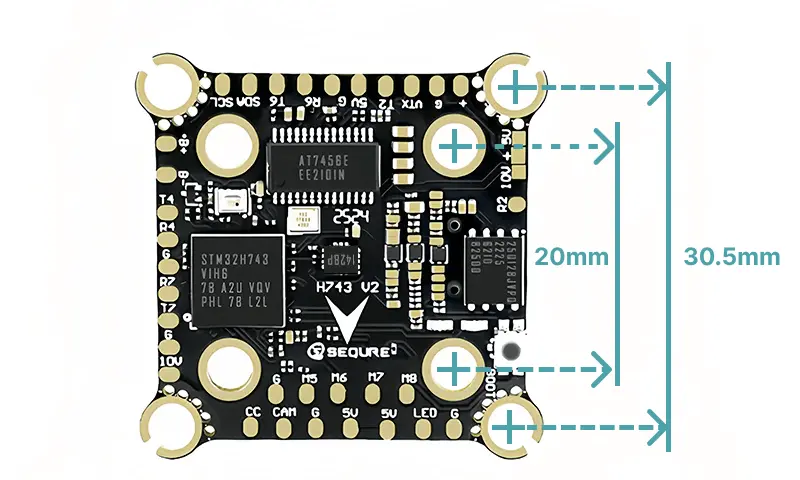
By the way, your choice of FC can also be limited by the frame you choose. There are several standard mounting patterns used to attach an FC to the frame with screws. All dimensions below are in millimeters:
- 16 × 16;
- 20 × 20;
- 25.5 × 25.5;
- 30.5 × 30.5;
Some FCs support multiple mounting patterns.
Electronic Speed Controller • ESC
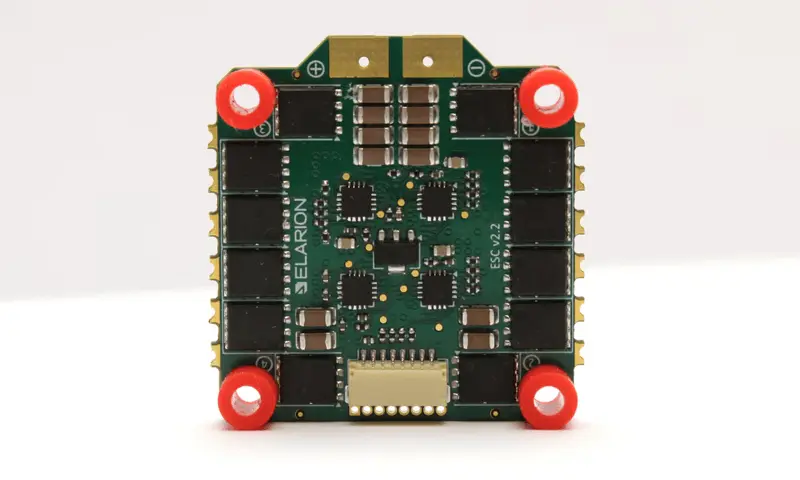
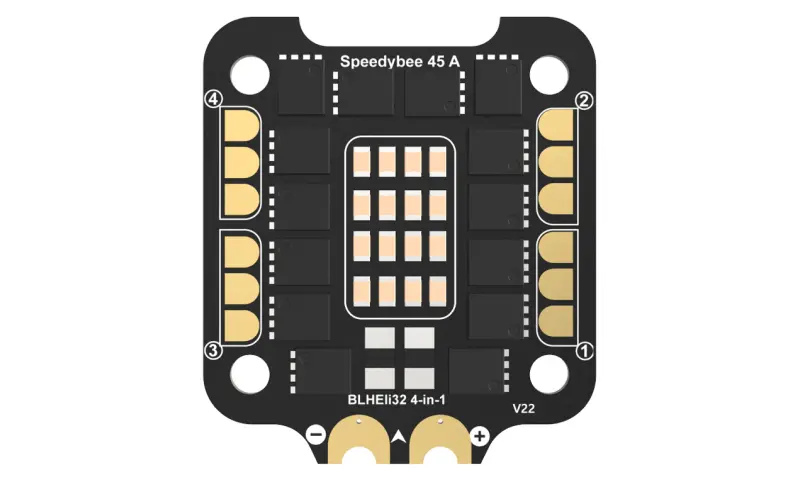
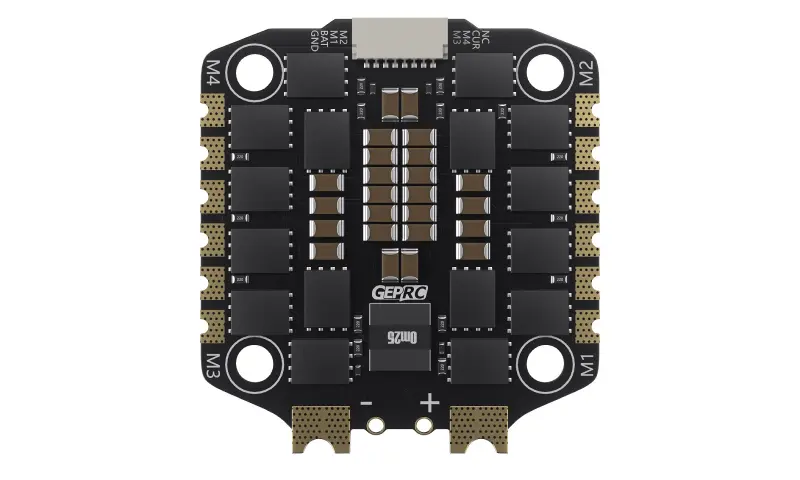
The ESC (Electronic Speed Controller) controls the motors. It receives commands from the FC. When you use the controller to tell the drone how you want it to turn, the signal first travels to the receiver in the drone and then from the receiver to the FC. The FC calculates how each motor needs to react and tells the appropriate motor or motors to increase or decrease power.
Each motor requires a separate ESC channel. In the past, four individual ESCs were commonly used, but today 4-in-1 ESCs are the most popular. They are more compact, lighter, and make the drone easier to assemble.
The most important ESC parameters are maximum current (A), supported battery voltage, and the firmware it uses. For example, a 55 A ESC means that each channel can handle up to 55 amps of current, so the total current draw of all four motors could theoretically reach 220 A. Of course, it’s very rare for all four motors to draw their maximum current at the same time — this would usually happen only for brief moments during aggressive flying. Because of these high currents, ESCs can get very hot, so good cooling and high-quality soldering are important.
Using a battery with a voltage that is too high can permanently damage the ESC. That’s why an ESC is usually chosen to match the battery voltage intended for the drone — for example, 4S, 6S, or 8S.
Video Transmitter • VTX
The VTX (Video Transmitter) transmits video from the camera to the FPV goggles. This is the system that gives the pilot the feeling of actually “sitting inside the drone.” I’ll keep the VTX discussion brief here, as it’s a very broad topic.
A VTX system consists of a camera, a video transmitter, and an antenna (you could also include the FPV goggles or video receiver in this group). These systems can be either analog or digital. Which one you choose depends heavily on the equipment you already own.
Analog systems are the simplest — as long as everything is compatible, you can use components from different manufacturers. Digital systems, on the other hand, are a completely different story. Each digital VTX manufacturer ties users to its own ecosystem. For example, DJI O3 or O4 systems are only compatible with certain DJI FPV goggles (and even then, different models may require different goggles). Other manufacturers of digital VTX systems include Caddx Walksnail and HDZero.
Of course, there’s less component matching to worry about when buying a digital system because all the necessary components are usually sold together. However, you should also keep in mind that some frames are specifically designed for systems such as the DJI O4.
By the way, I’m going to contradict myself a little here — a relatively new open-source digital system/protocol called ArtLynk is gaining popularity. It isn’t yet as advanced as the protocols from the established players, but its more open nature gives it one major advantage — it can be several times cheaper.
Your choice of VTX determines which FPV goggles you can use, what video quality you’ll see, how much video latency you’ll experience while flying, and ultimately how much the entire drone build will cost. I have a separate guide comparing the most popular FPV video systems, including analog and digital options.
Receiver
The receiver (RX), as the name implies, receives signals from the pilot’s controller and sends them to the flight controller (FC). Today, the FPV world is practically dominated by the open-source ELRS (ExpressLRS) radio system. Because of its open nature, there is a huge selection of receiver models available. Once you’ve chosen one, you’ll also need to bind the ELRS receiver to your controller.
An alternative to ELRS that used to “rule” the FPV world is TBS Crossfire. However, it isn’t open source, which is one of the reasons it is usually more expensive. It is still quite popular when the main goal is reliability and long range flying, although ELRS is often said to have practically caught up with — or even surpassed — Crossfire in many areas.
The receiver itself is usually very small and has one or two antennas.
ELRS receivers operate on 2.4 GHz and 900 MHz frequency bands. TBS Crossfire operates only on the 900 MHz band.
By the way, there’s an interesting exception with DJI O3/O4 VTX systems — when using them, you can actually skip the separate receiver. The VTX system can perform this function through its SBUS connection (the yellow wire). There is a small catch, though: if you choose to use the DJI VTX as the receiver for the controls, you’ll also have to use a DJI FPV controller. Still, you can combine a DJI O4 system with an ELRS receiver.
GPS Module
A GPS module allows the drone to determine its position. It isn’t an essential component of a drone build, which is why freestyle pilots often don’t use one — unlike long range or cinematic pilots.
GPS allows you to:
- see your coordinates;
- see your speed;
- see the distance;
- use GPS Rescue mode.
Betaflight GPS Rescue isn’t a full autopilot — it’s an emergency feature designed to help bring the drone back toward the pilot if the control link is lost.
Modern GPS modules often support multiple satellite navigation systems, including GPS, Galileo, GLONASS, and BeiDou.
Antenna
Antennas have a major impact on connection quality. Even with expensive electronics, poorly chosen antennas can significantly reduce:
- range;
- signal stability;
- video quality;
- resistance to interference, which is a common issue when using unlicensed frequency bands.
FPV drones typically use two types of antennas: video antennas connected to the VTX and control link antennas connected to the RX.
When choosing antennas, you need to consider the frequencies used by the other components, the size of the drone you’re building, and how you plan to fly it — freestyle, long range, or racing.
Battery
FPV drone batteries deserve a separate post of their own, so I’ll keep this section brief. FPV drones most commonly use Li-ion, LiPo, or LiHV batteries.
- Li-ion: better efficiency and long range flights;
- LiPo: more power and more aggressive flying;
- LiHV: higher maximum voltage and even more power.
The battery is often the heaviest single component of the entire drone, so your choice has a significant impact on:
- flight time;
- handling;
- center of gravity.
So, what does all this mean?
At first glance, all these FPV drone parts can make building a drone seem very complicated. But once you start understanding the purpose of each individual component, everything starts falling into place.
And this is where one of the biggest advantages of building your own FPV drone comes in: you don’t just “use a drone” — you actually understand how it works.
P.S.
You may have already noticed that a few things are still missing — things that are essential if you actually want to get the drone into the air and control it:
- If there’s a receiver, there also has to be a transmitter — or, in other words, an FPV controller.
- FPV goggles.
I deliberately left them off the list because the next few posts will be specifically about these components.
Sources
- GemFan naming discrepancies explained by Joshua Bardwell https://www.youtube.com/watch?v=RmWYhWCt22M
Leave a Reply