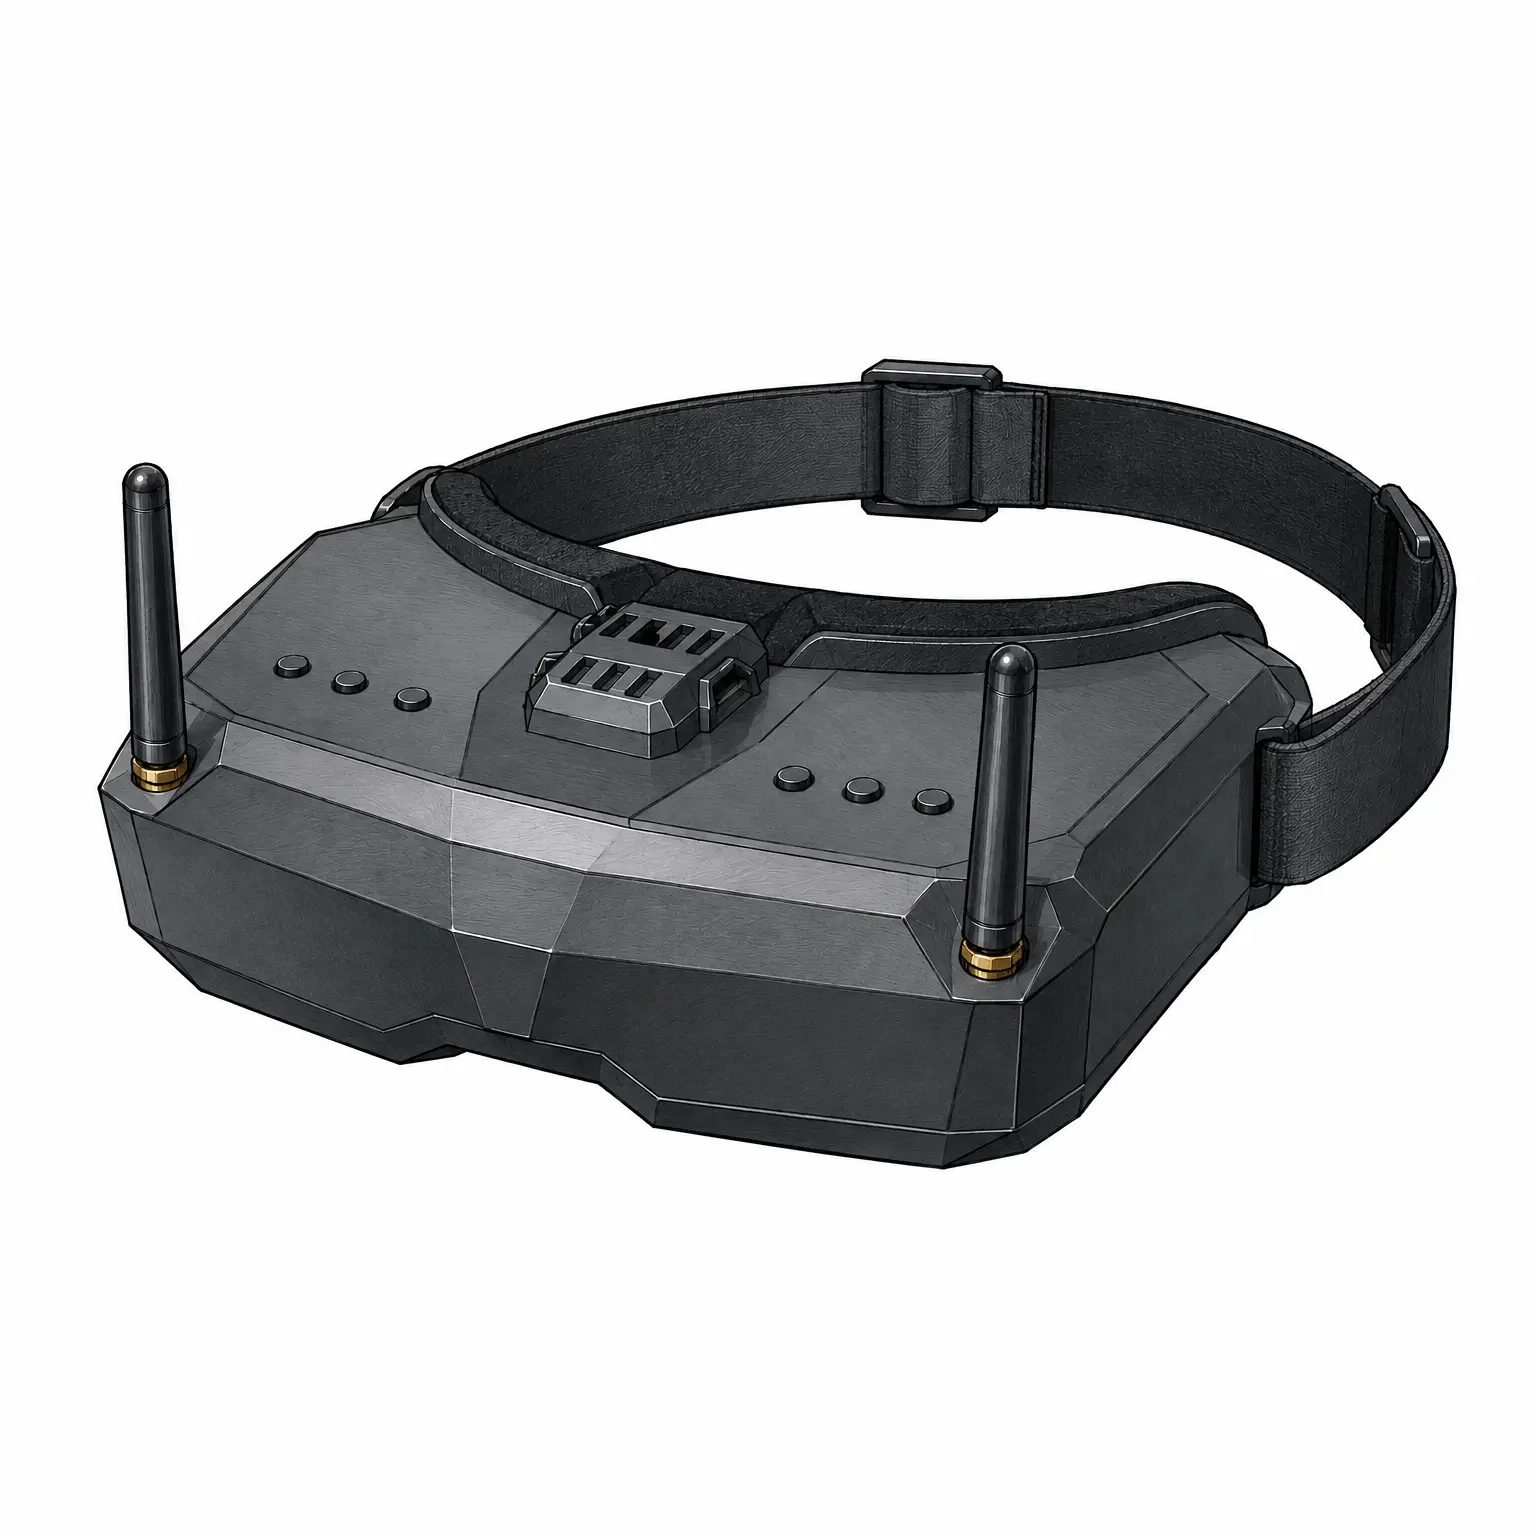
If you’ve read my previous guide to FPV video systems, you’ve probably already realized that choosing FPV goggles isn’t completely straightforward. Not all goggles work with every FPV system, so you’ll usually need to choose your video system first and only then start looking for the right goggles.
And that’s where the fun begins.
You open a store and see dozens of models. Some look like miniature movie theaters strapped to your face, while others look like ski goggles from the future. Some cost $70, others $700. Some have OLED displays, others LCD. Some let you adjust the diopters, others don’t.
So, let’s figure out what all these FPV goggle specs actually mean in practice.
And I apologize in advance for the length of this guide. I really didn’t expect it to turn out this long.
Table of Contents
The most important FPV goggle specs
Strangely enough, the most expensive FPV goggles aren’t necessarily the best ones for you. Some pilots are perfectly happy with $200 goggles, while others sell their $700 top-of-the-line goggles after just a few flights. The reason is simple: the specs that matter most often aren’t the ones manufacturers print in the biggest letters in their marketing materials.
Before looking at the extra features, let’s first figure out what actually determines image quality, comfort, and the overall flying experience: goggle type, display, FOV, IPD, diopter adjustment, battery, weight, and price.
Goggle type
The first choice you’ll face is the form factor. Two types dominate the FPV world: binocular goggles and box goggles.
Box goggles
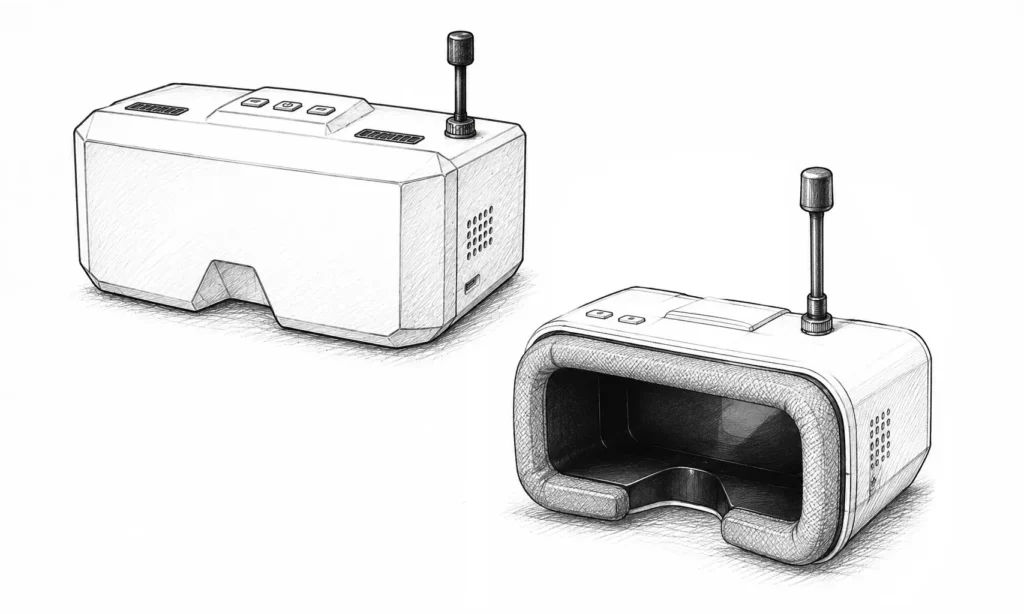
Box goggles are generally considered the budget-friendly option and are often the first FPV goggles new pilots buy. However, that certainly doesn’t mean they’re bad. Their obvious advantages are a lower price, a large display — most commonly around 3.5–5 inches — and, often, a built-in battery. Most importantly, they’re simple to use. They can also be a convenient option for people who wear glasses and want to keep them on while flying. In terms of appearance, they’re a bit like having a smartphone mounted inside a pair of goggles.
Of course, their biggest drawbacks are size and weight. They’re bulkier, heavier, and take up more room in a backpack. And then there’s the LCD display. Compared with OLED… well, there really isn’t much of a comparison.
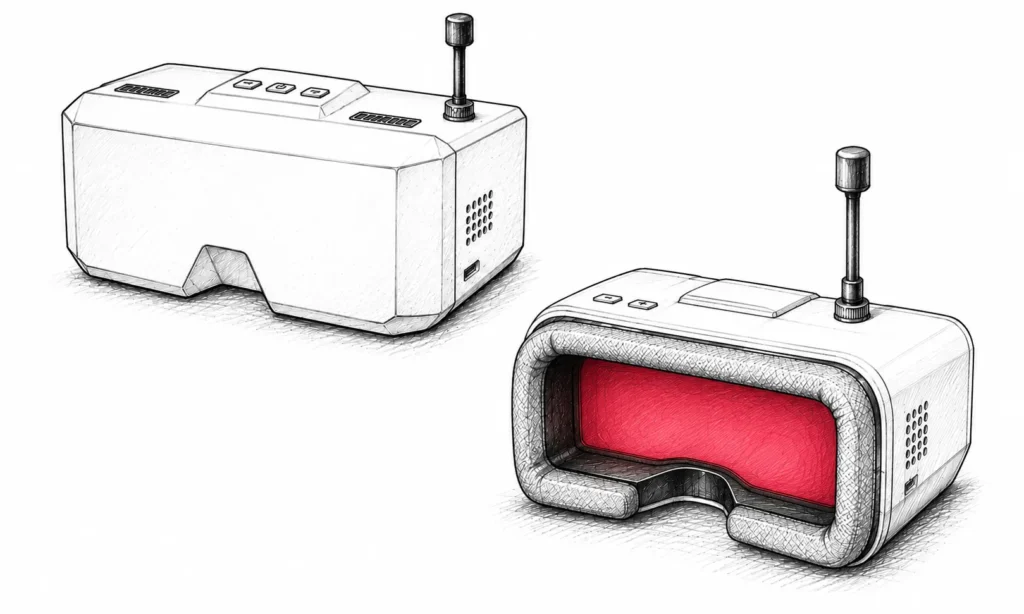
Over time, many pilots move on to binocular goggles.
Binocular goggles
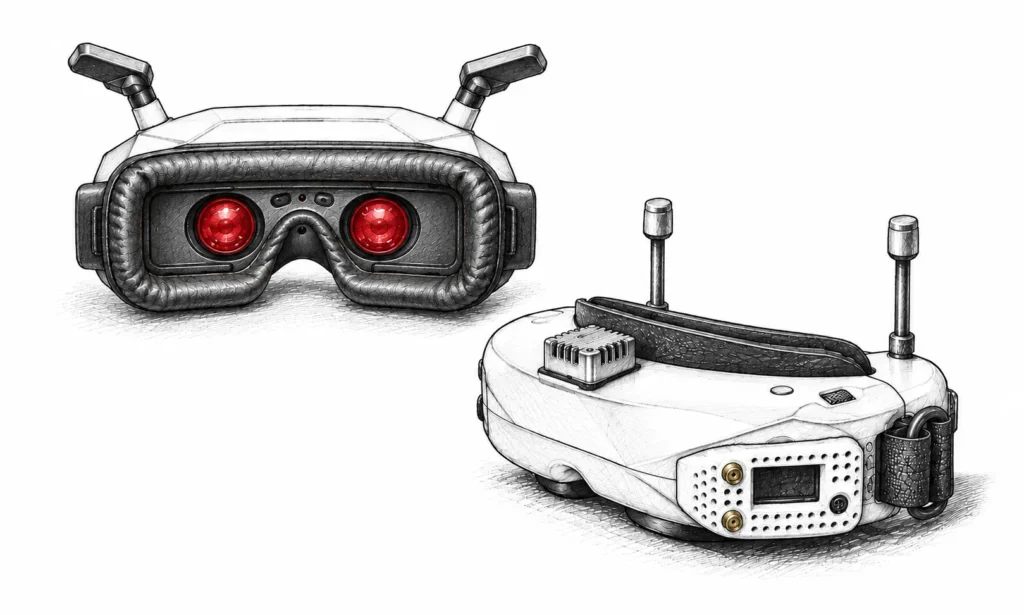
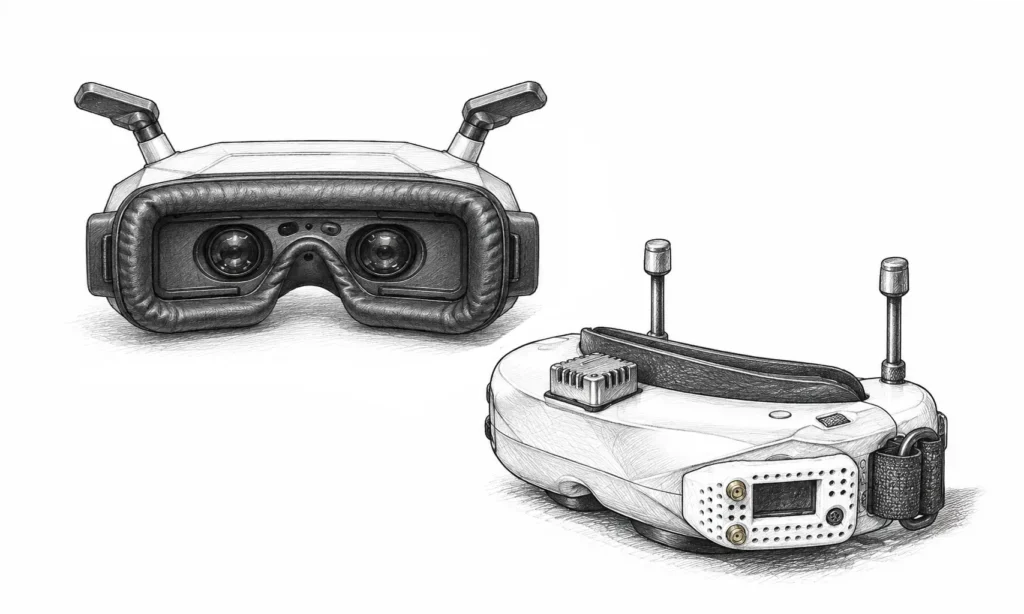
Binocular goggles are the most popular choice among more experienced FPV pilots. Instead of one large display, they typically use two much smaller displays — usually around 0.45–0.5 inches — one for each eye. These are often OLED displays. Their biggest advantages are image quality, a more compact size, and lower weight. Many models also offer additional adjustments and features such as adjustable IPD, diopter adjustment, replaceable VRX modules, and HDMI inputs. If you plan to stick with the FPV hobby for more than a few months, there’s a good chance you’ll eventually end up in this segment.
The first time you put on a good pair of OLED goggles, you’ll usually understand immediately why they cost more.
Display
The FPV goggles I looked at use one of two main display technologies: OLED or LCD.
OLED displays are most commonly found in binocular goggles, while LCDs are more common in box goggles. However, there are exceptions.
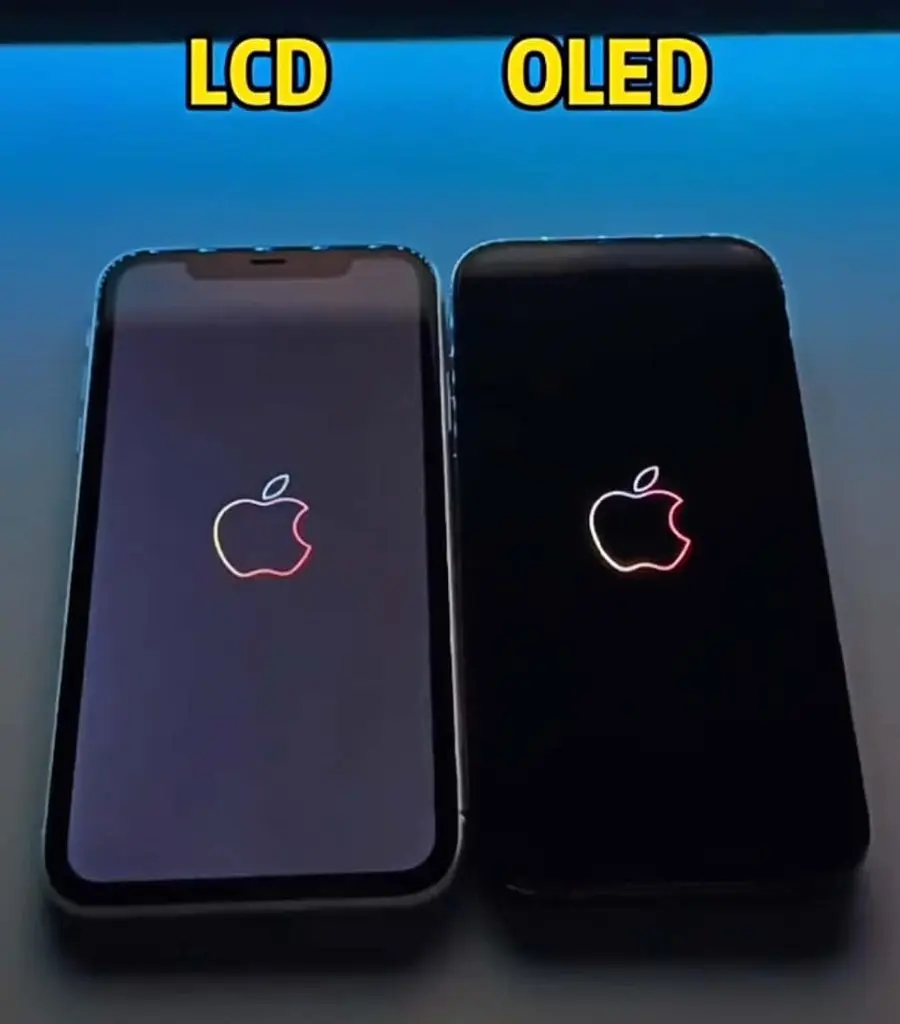
OLED displays offer deeper blacks, higher contrast, and more vivid colors. If you’ve ever watched a movie on a good OLED TV, you’ll see a similar effect in FPV goggles. Shadows look darker, bright areas appear more vivid, and the whole image simply feels more “alive.”
LCD displays are generally cheaper, allowing manufacturers to offer more affordable goggles. That doesn’t mean LCD is bad — generations of FPV pilots learned to fly using it. However, put LCD and OLED goggles side by side and you’ll usually notice the difference immediately.
OLED does have one important drawback, though. These displays really don’t like direct sunlight. If you accidentally leave the goggles facing the sun, the lenses can act like magnifying glasses and permanently damage the displays. Because of this, many experienced pilots get into the habit of putting their goggles back in the case or covering the lenses immediately after flying.
Source: vislcd.com
Display resolution
Display resolution is fairly straightforward: the higher the resolution, the sharper and more detailed the image can appear. With a lower resolution, it becomes harder to make out small obstacles, tree branches, or objects farther away.
Higher-resolution displays also have another advantage: individual pixels are less noticeable, so the image looks smoother and more pleasant to the eye.
However, there’s one important catch. A high display resolution alone doesn’t work miracles. If the FPV system is transmitting a low-quality video feed, a high-resolution display won’t magically turn it into 4K. This is especially relevant with analog systems, where the transmitted video quality (PAL/NTSC) is far below what modern displays are capable of showing.
That naturally raises a question: why would you need a much higher display resolution in the first place, especially if you fly with an analog FPV system? One reason is that higher-resolution FPV goggles often also include an HDMI input. I’ll come back to why that matters a little late
Video modes
At first, I wasn’t even sure whether this parameter deserved its own section. Some manufacturers specify hertz (Hz), others frames per second (FPS), while some don’t mention either at all. To make things even more confusing, Hz refers to the display’s refresh rate, while FPS refers to the number of complete frames delivered per second. So, if an FPV system delivers 25 FPS and the display refreshes at 100 Hz, the same frame can be displayed four times. Still, in practical terms, both numbers help describe how frequently the image you see is updated.
It’s also important not to confuse two different things here:
- the video you see in the goggles in real time;
- the video recorded to an SD card using the DVR function.
In this case, we’re interested specifically in the real-time video shown in the goggles — commonly referred to as the live feed.
If you see 60 Hz or 60 FPS in the specifications, it means the display or video system can refresh or deliver up to 60 times or frames per second, respectively. At 100 Hz or 100 FPS, that number rises to 100. The higher the number, the smoother motion can appear. This is especially noticeable in racing or more aggressive freestyle flying, where the drone changes direction very quickly. In addition, higher frame rates are often associated with lower latency because systems designed to deliver more frames per second generally require faster video processing and transmission.
The first time you switch from a 60 FPS system to a 100 FPS one, the difference can feel a lot like moving from an old 60 Hz computer monitor to a 144 Hz monitor. The image doesn’t necessarily look sharper — instead, it feels easier on the eyes and more natural during fast movement.
With analog FPV, things work a little differently. Here, you’ll usually encounter PAL and NTSC video standards rather than the high frame rates advertised by modern digital FPV systems. Because of this, manufacturers of analog goggles often don’t emphasize frame rate in their specifications.
FOV – field of view
FOV, or field of view, describes how much of your vision is occupied by the image inside the goggles. Put simply, it tells you how large the “virtual screen” in front of your eyes will appear.
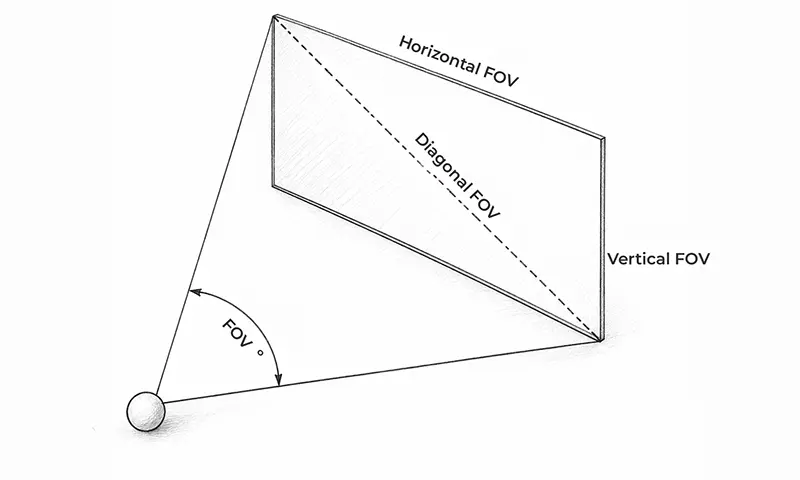
Just like the camera FOV I discussed in my FPV video systems article, goggle FOV is measured in degrees. However, this time we’re not talking about how much of the environment the camera can see, but how much of your own field of vision is occupied by the displayed image.
Because of their design, box goggles generally have a larger FOV than binocular models. However, bigger doesn’t necessarily mean better. At first glance, it might seem obvious that a larger FOV is preferable — after all, you get a bigger image. In practice, though, things are a little more complicated.
If the FOV is very small, the image can feel like watching a TV from the other side of the room. Everything is clearly visible, but you lose some of the immersion and sense of speed. If the FOV is very large, on the other hand, the image becomes much more immersive and fills a large portion of your vision. That creates another problem: to see OSD information in the corners of the screen, you may need to shift your eyes slightly away from the center. Although we’re talking about only a few millimeters of eye movement, it can become distracting during racing or aggressive freestyle flying.
There’s another nuance as well: with some goggles, a larger FOV can make it harder to keep the entire image equally sharp. As a result, the edges may appear slightly softer or less sharp than the center.
For these reasons, many experienced pilots consider an FOV of roughly 36°–45° to be the most comfortable range. A smaller FOV can feel like looking through a window, while a very large one can make some pilots feel as if they’re sitting in the front row of a movie theater.
Interestingly, manufacturers don’t always specify FOV in the same way — if they specify it at all. Diagonal FOV is the most common measurement, but some manufacturers provide horizontal or vertical FOV instead. Because of this, simply comparing the numbers doesn’t always give you an accurate comparison between different goggles.
If you’re buying FPV goggles for the first time, it’s practically impossible to know from the specifications alone what FOV you’ll prefer. This is one of those parameters that’s best tested in person — or, at the very least, by borrowing a friend’s goggles for a few flights.
Diopter adjustment
Diopter adjustment is almost exclusively a feature of binocular FPV goggles. For pilots who wear glasses or contact lenses every day, the available diopter adjustment range can be one of the most important specs when choosing goggles.
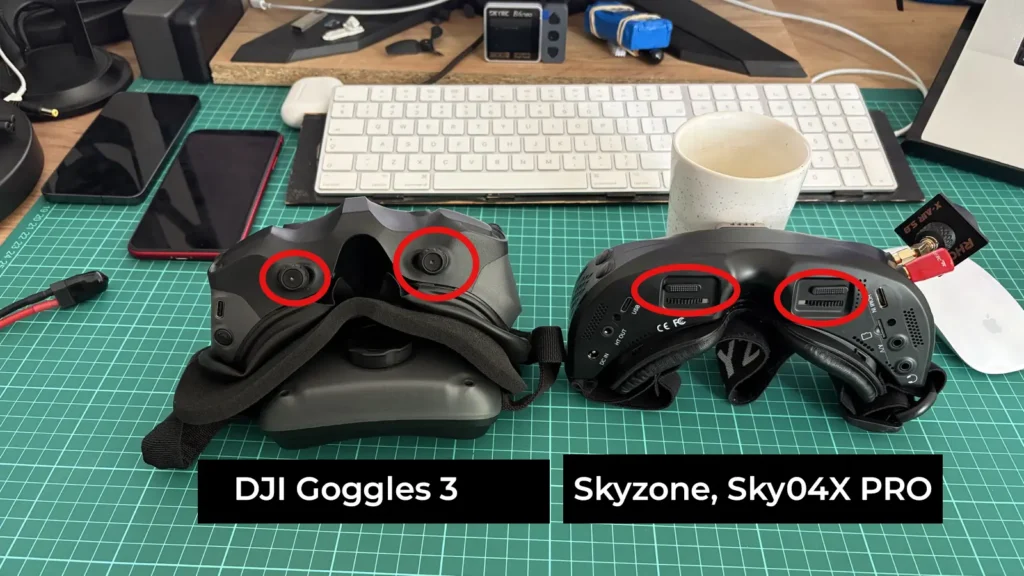
(Image: diopter adjustment dials on DJI Goggles 3 and Skyzone SKY04X PRO goggles)
The purpose of diopter adjustment is simple: it allows you to see the image clearly without wearing prescription glasses underneath your FPV goggles. On most models, the diopter can be adjusted independently for each eye using dials, usually located on the bottom or sides of the goggles.
Across the market, adjustment ranges vary roughly from -8 to +6 diopters, although many models offer something closer to -6 to +2.
Before buying, it’s worth checking your eyeglass prescription. If your vision correction falls outside the range specified by the manufacturer, the image may still not be sharp enough even with the diopter adjustment set to its limit. In that case, you may need to wear contact lenses or order prescription lens inserts that fit directly into the FPV goggles — although not every model supports them.
There’s another nuance: even if your prescription falls within the advertised range, adjustment mechanisms differ between manufacturers. So, if you have the opportunity, try the goggles in person for at least a few minutes before buying them.
IPD – interpupillary distance
IPD (interpupillary distance) is the distance between the centers of your left and right pupils. This parameter is relevant only to binocular FPV goggles because they use two separate displays — one for each eye.
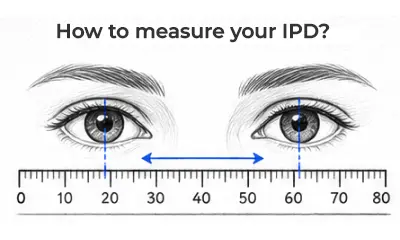
Because everyone’s eyes are positioned slightly differently, the displays and lenses inside the goggles need to be aligned with your eyes. That’s exactly what IPD adjustment is for. When IPD is set correctly, the image looks sharp and natural and remains comfortable to view even during longer flying sessions. If it’s set incorrectly, however, you may notice several problems:
- the image may not look completely sharp;
- it may be harder to focus your eyes;
- your eyes may get tired more quickly;
- you may develop a headache;
- longer flying sessions may cause eye strain.
IPD varies from person to person, so before buying FPV goggles, it’s worth checking the manufacturer’s specified adjustment range. Most goggles are designed around typical adult measurements, but if your IPD is close to either end of the supported range, you may run into comfort issues.
Unlike diopter adjustment, IPD has nothing to do with visual acuity. Even if you have perfect eyesight, incorrectly adjusted IPD can make FPV goggles uncomfortable to use.
If you don’t know your IPD, you can measure it fairly accurately with a simple ruler in front of a mirror. For a more precise measurement, an optician may already have it on record if you’ve had an eye exam. I also found a very clear video explaining IPD using VR goggles as an example. Although the video is about VR, the same principle applies to FPV goggles: YouTube link
Power and batteries
One of the specs people rarely pay attention to when choosing their first FPV goggles is how they’re powered. In practice, there are two main options: a built-in battery and an external battery — or a combination of both. For the purposes of this guide, I also consider USB power an external option because, in most cases, there’s a power bank connected to the other end of that USB cable.
Built-in battery
A built-in battery offers the most convenience — at least in the beginning. After buying the goggles, you don’t have to worry about additional batteries, chargers, or cables. Just charge them like a phone and you’re ready to fly. Built-in batteries are most commonly found in box goggles, although there are exceptions. Some binocular goggles also use an integrated battery.
The biggest drawback of a built-in battery becomes more apparent after a few years of use. Just like the battery in your phone, it gradually wears out, and replacing it isn’t always easy. Another problem is running out of battery while you’re out flying with no way to connect an external power source. At that point, you’re done flying for the day — unless you feel like practicing some VLOS flying without the goggles.
Fortunately, many newer models can also use an external power bank through USB, so this limitation isn’t nearly as painful as it could be.
External battery
Most binocular FPV goggles use external batteries. In this case, a separate battery is connected to the goggles. At first, that might seem inconvenient — another cable and another battery sitting in your pocket or attached to the head strap. However, in the long run, this approach has plenty of advantages.
The biggest advantage is easy battery swaps and effectively unlimited runtime, as long as you carry enough charged batteries. If one runs out, you can simply swap it for another and keep flying. There’s no need to wait for the goggles to recharge.
Many FPV goggles accept power from 2S–6S batteries, but you should always check the manufacturer’s specified input voltage before plugging one in. Some models support a much narrower voltage range. Although you can use LiPo batteries for many goggles, Li-Ion packs built from 18650 or 21700 cells are also a popular option because they can provide plenty of runtime without needing the high discharge rates required by an FPV drone.
In addition, more and more goggles can be powered directly through USB-C. This means you can run them from a regular power bank. It’s especially convenient when using the goggles with an FPV simulator — many modern computers already have USB-C ports — or during longer trips when you’d rather carry fewer dedicated batteries.
Personally, I built 4S2P and 2S1P battery packs for my goggles using 18650 cells. A single charge lasts me through more than one flying session.
Weight
Weight often seems like a secondary consideration. After all, the goggles sit on your head, not in your hands. However, after an hour or two of flying, you might start thinking differently. There’s a rather grim saying in Lithuanian that even a dog gets used to being hanged. An FPV pilot can get used to the weight of their goggles too. That doesn’t make heavier goggles more comfortable, though. Over time, extra weight puts more strain on your neck and can cause fatigue during longer flying sessions.
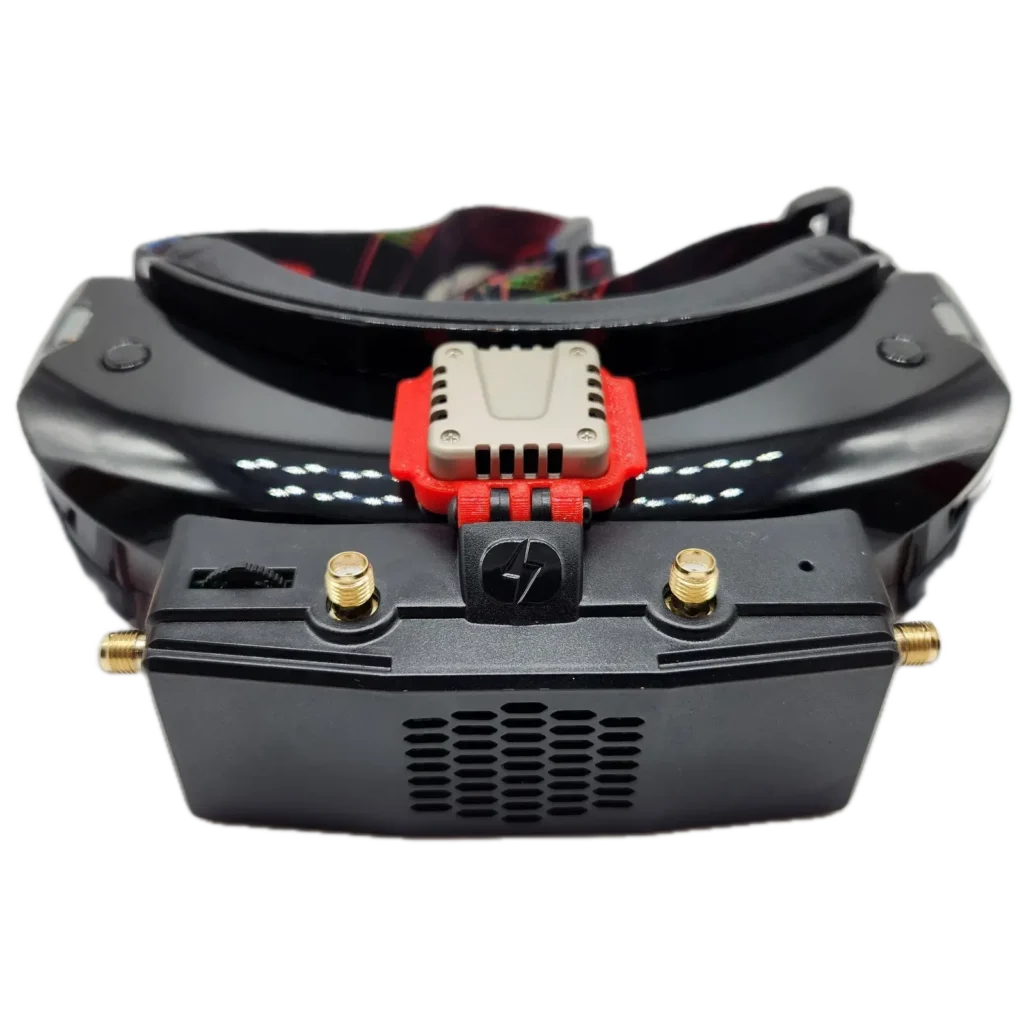
Weight becomes even more important if you plan to use additional hardware. For example, many pilots connect external VRX modules to their analog goggles through HDMI:
- HDZero VRX — around 85 g;
- Skyzone SteadyDigital VRX — around 80 g;
- Walksnail VRX — around 83 g.
At first glance, an extra 80 grams might not seem like much. However, these modules are usually mounted on the front or side of the goggles. As a result, they not only increase the overall weight but can also put more strain on your neck by shifting the center of gravity. That’s why simply looking at the weight listed in the specifications doesn’t tell the whole story. Two goggles that weigh exactly the same can feel completely different depending on how that weight is distributed and how well they fit your face.
If you plan to use the goggles only in their stock configuration, weight usually isn’t a critical factor. However, if you think you might eventually add an external VRX module, extra antennas, or a larger battery to the head strap, it’s worth starting with a lighter pair of goggles.
Price
Price is one of the trickiest factors when choosing FPV goggles. At first, it seems simple: open the manufacturer’s website, check the price, and that’s it. In practice, however, the final cost can end up being considerably higher.
When buying directly from a manufacturer overseas — often from China — don’t look only at the listed price. Shipping, import fees, sales tax, and return costs can all affect the final total. Sometimes an option that initially looks cheaper ends up costing about the same as buying from a U.S. retailer once everything is included. Buying domestically can also mean faster shipping and simpler warranty or return support. And, of course, compare prices from several stores. 🙂
First, check what’s actually included in the package. Some goggles are sold completely ready to use, while others require you to buy a VRX module, antennas, and a battery separately. For example, a $300 pair of goggles might initially look cheaper than a $450 model. However, once you add a VRX module, antennas, and a battery, the final price can be very similar. Also keep in mind that prices can vary significantly between stores. Some models can be purchased directly from manufacturers such as Skyzone, BetaFPV, or DJI, while others are mainly sold through distributors.
My recommendation is to compare the cost of the entire setup, not just the FPV goggles:
- goggles;
- VRX module (if required);
- antennas;
- battery.
Sometimes more expensive goggles turn out to be the cheaper option in the long run because you don’t need to buy additional accessories or upgrades. The FPV hobby has a funny habit: you usually don’t regret buying goggles that were too expensive. More often, you regret buying ones that were too cheap and replacing them six months later.
Specs that matter more than you might think
If you’ve been reading carefully up to this point, you should already have a pretty good idea of how to choose your first FPV goggles. Display, FOV, IPD, diopter adjustment, weight, and battery options are all specs that matter to practically every pilot.
However, there’s another group of specs and features that can seem unnecessary at first. More than once, I’ve thought, “Why would I ever need this?” Six months later, that exact feature turned out to be the one I missed the most.
DVR recording, HDMI input, replaceable VRX modules, and replaceable antennas usually don’t become important during your first week of flying. Instead, they start to matter as the hobby grows along with your skills and your collection of gear.
So, I’d put these specs into the “nice to have now, really painful not to have later” category.
DVR (SD card)
My first FPV goggles were the BetaFPV VR02. There was one feature I really missed: DVR. At the time, I thought DVR was mainly useful for showing your friends a new trick you’d learned. And that’s partly true. First of all, it’s a great way to record your flights. Sometimes you accidentally capture an especially nice shot that you never planned to record. Sometimes you want to show your friends a new trick. And sometimes, a few years later, it’s simply fun to watch your first flights again and realize how far you’ve come.
DVR also has a very practical use: it can help you find a crashed drone. If your drone disappears into tall grass, a forest, or some bushes, the last few frames of the DVR recording can often help you figure out roughly where it went down.
When comparing DVR capabilities, it’s worth checking:
- recording resolution;
- maximum FPS;
- maximum supported SD card capacity;
- video codec (MJPEG, H.264, H.265).
If you plan to create content or analyze more complex maneuvers, a higher DVR frame rate can be useful. Recording at 60 FPS or above gives you more frames to work with when reviewing fast movement or creating slow-motion footage.
However, with an analog system, the DVR can’t record more video information than it receives from the FPV video system itself. Therefore, even a very capable DVR can’t overcome the limitations of the incoming analog video signal.
HDMI input
When I was choosing my second pair of FPV goggles for an analog system, an HDMI input was one of my most important criteria. At the time, I thought I would only use it for FPV simulators.
By connecting the goggles to a computer, you can use them as the display while flying in an FPV simulator. A colleague told me that once he started practicing in a simulator with goggles, his racing results improved because the experience felt closer to real FPV flying.
However, over time I realized that simulators are only one of several reasons to have an HDMI input. An even more important use is connecting an external VRX module. This can allow otherwise incompatible goggles to receive video from another FPV video system. For example, depending on compatibility, goggles with HDMI input can be used with external receivers such as:
- Walksnail Avatar VRX;
- HDZero VRX;
- Skyzone SteadyDigital VRX;
- HGLRC Draco VRX;
- Walksnail Ascent VRX.
In other words, one good pair of goggles can survive more than one generation of FPV video systems.
The only catch is that different goggles use different HDMI connector sizes. Some have a full-size HDMI port, while others use mini-HDMI.
And one more practical tip from experience: if you plan to use HDMI input with a simulator, spend a few extra dollars on a good, flexible cable. Stiff HDMI cables become annoying very quickly.
By the way, this is also where the display resolution I mentioned earlier becomes relevant. When you connect the goggles to a computer and use them as a display for an FPV simulator, the advantage of a higher resolution becomes much more obvious.
Replaceable VRX module
Here, I’m not talking about an external VRX module connected through HDMI input. A replaceable VRX module is a video receiver that mounts directly onto or inside the goggles and can be replaced with a different model.
Many binocular analog goggles, as well as some analog box goggles, have a dedicated slot for a replaceable VRX module. Some goggles are sold with a module selected by the manufacturer, while others come without one, allowing the pilot to choose a compatible receiver from the start.
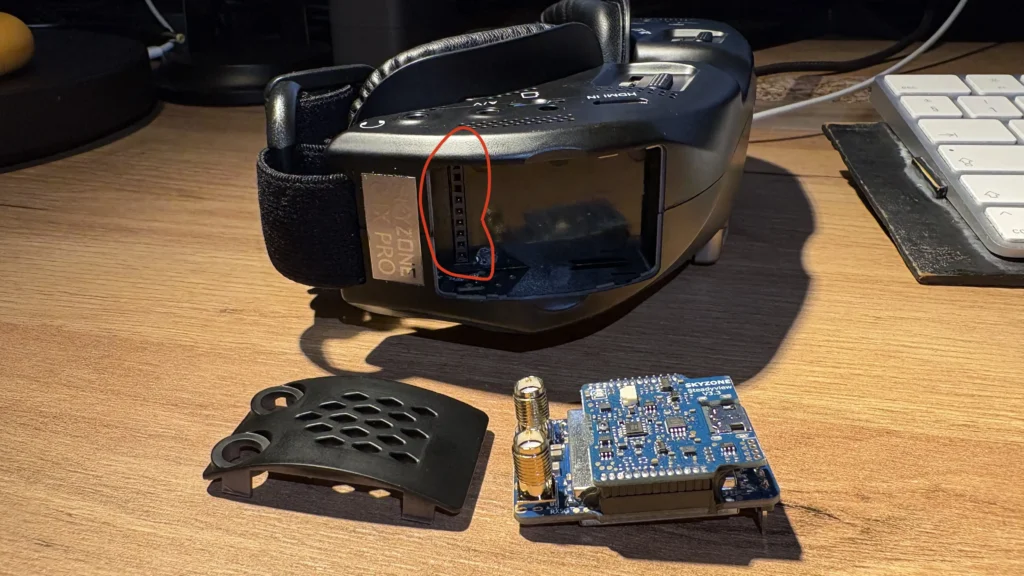
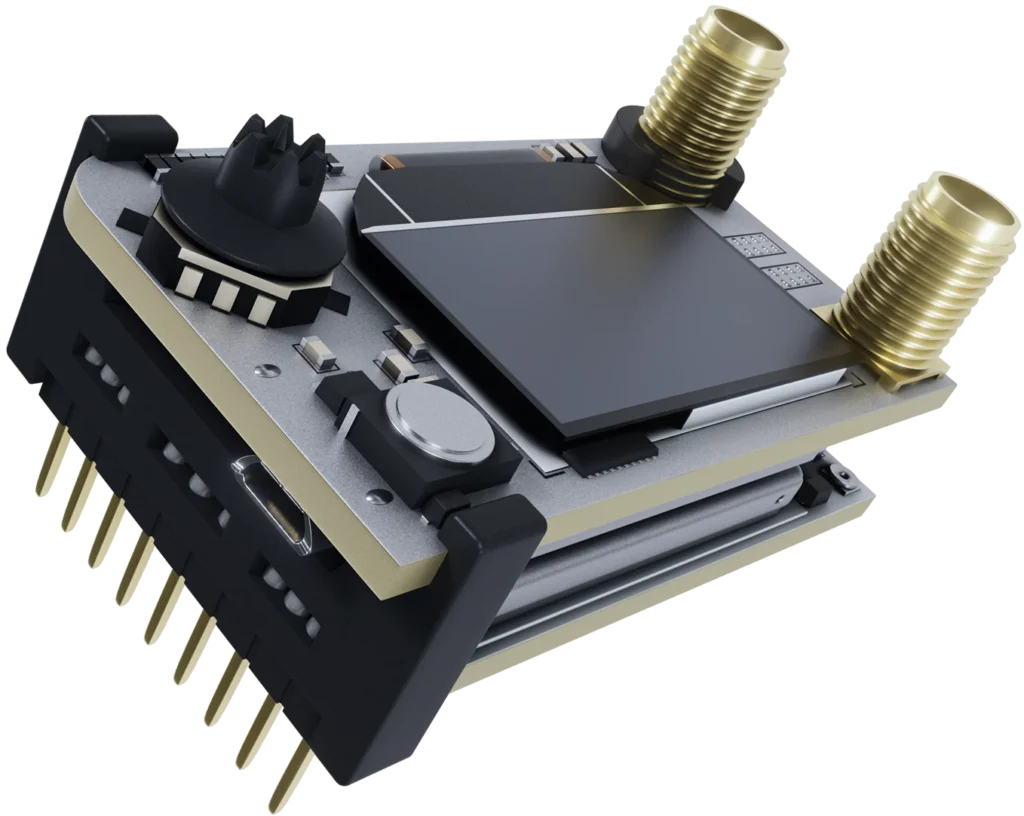
The main advantage of this approach is flexibility. If a better analog VRX module appears on the market a few years later, you can often replace just the receiver instead of the entire pair of goggles. This is exactly why some older analog goggles are still relevant today. Plenty of pilots still fly successfully with FatShark or Skyzone goggles that are more than five years old because they’ve been upgraded with modern analog receivers.
However, there’s one important detail to understand. Replaceable VRX modules have traditionally been associated mainly with analog FPV. If you want to add another digital FPV system to your goggles, you’ll usually need a separate external VRX connected through HDMI input.
So, when choosing goggles, it’s worth asking yourself:
- Do I plan to fly only analog?
- Might I want to switch to a digital system in the future?
- Do the goggles have HDMI input in case I want to add an external VRX later?
There is one interesting exception, though. BetaFPV has announced the P1 HD VRX (Nano) for its ArtLynk-based P1 HD video system. Unlike the external digital VRX modules discussed earlier, this receiver is designed as a module for compatible analog goggles. In other words, it could allow analog goggles with a compatible module bay to receive a digital FPV system without using an external VRX module. At the time of writing this part of the article in September 2026, the P1 HD VRX is still in beta and isn’t yet generally available for purchase.
Number of antennas
Many FPV goggles and VRX modules use more than one antenna, but the number alone doesn’t tell the whole story. Multiple antennas can allow the receiver to take advantage of signals arriving from different directions. That’s also why FPV pilots often combine different antenna types — for example, a directional antenna with an omnidirectional one.
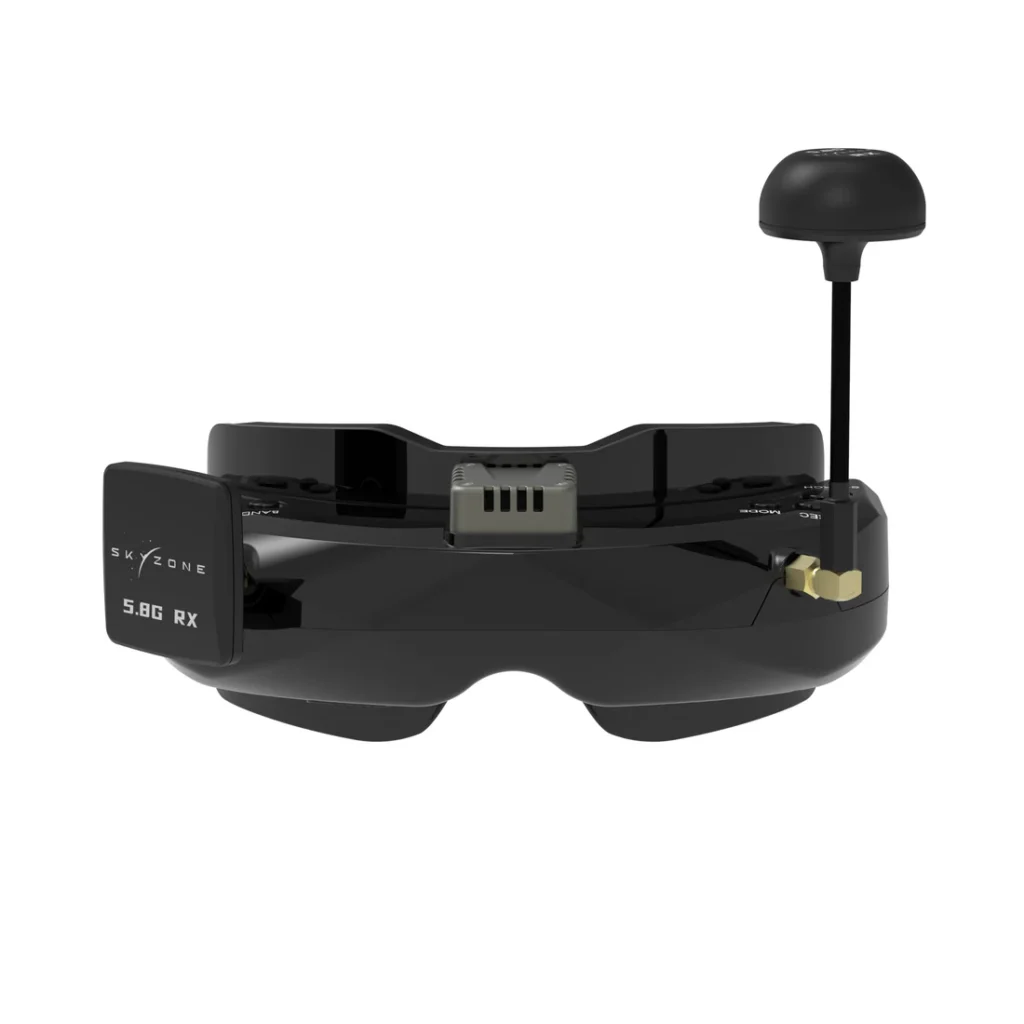
With a diversity receiver, the VRX can monitor the signal from multiple antennas and select the one providing the better signal at that moment. More advanced receivers can go a step further and combine information from multiple receiver paths rather than simply switching between antennas. Depending on the implementation, these systems can provide a more stable image in challenging environments — for example, between trees or buildings, or when flying behind yourself.
For a beginner, the antenna count alone usually shouldn’t be a deciding factor. However, as you progress, it’s worth paying attention to both the number of antenna connections and the type of diversity or receiver system the goggles use.
Are the antennas replaceable?
Many FPV goggles allow you to replace the antennas included by the manufacturer. At first, this might seem like a minor detail. In practice, however, antennas can often have a bigger impact on signal quality than the goggles themselves. A common beginner mistake is spending the entire budget on goggles and then using the mediocre antennas included in the box. You could put it this way: two bad or mediocre antennas won’t replace one top-quality antenna.
Better antennas can improve:
- range;
- signal stability;
- penetration through obstacles;
- image quality at the limits of your video link.
So, if your budget is limited, it can sometimes make more sense to choose slightly cheaper goggles and invest some of the money you saved in better antennas. Personally, I think this is one of the best investments you can make in FPV gear. Good antennas can remain useful for many years — and, for that matter, carefully chosen goggles with the right features can stay relevant for just as long.
SMA or RP-SMA?
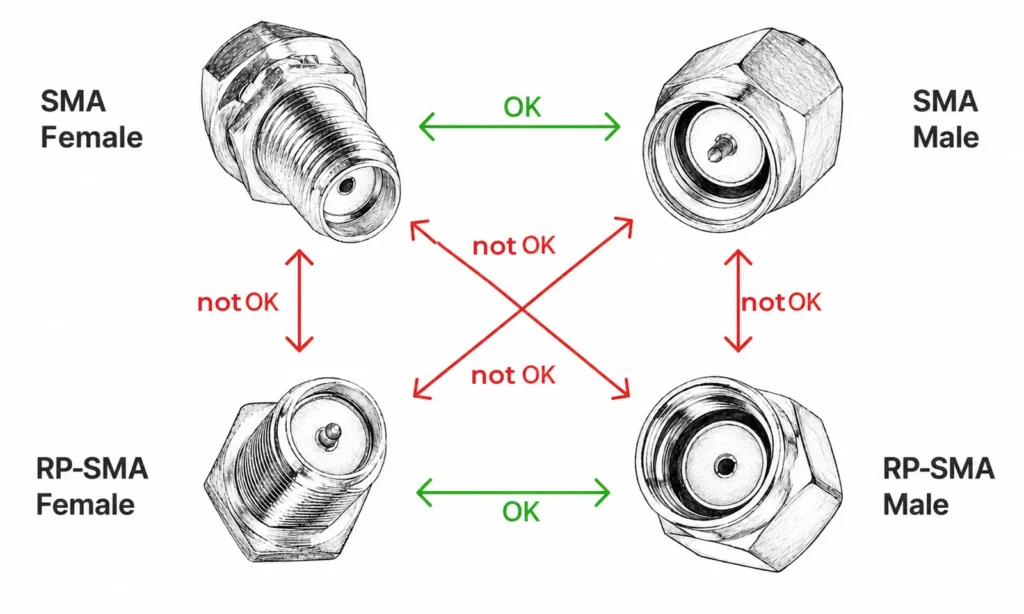
Before ordering new antennas, make sure you check the connector type. The two most common options are:
- SMA
- RP-SMA
At first glance, they look very similar, but they aren’t interchangeable.
Polarization
If you’re using circularly polarized (CP) antennas, it’s important that the drone and goggles use the same polarization:
- RHCP (right-hand circular polarization);
- LHCP (left-hand circular polarization).
An RHCP antenna works well with another RHCP antenna, while LHCP works with LHCP. However, if you mix RHCP and LHCP, the signal becomes significantly weaker. As a result, both range and image quality suffer immediately.
By the way, I’m planning a separate article about antennas because this is one of those FPV topics where spending a few extra dollars can sometimes make a bigger difference than an equipment upgrade costing hundreds.
Channels
The number of channels is most relevant to analog FPV systems. Each channel corresponds to a specific radio frequency used by the VTX to transmit video and by the goggles to receive it. Most analog goggles support several standard frequency bands, giving you dozens of channels to choose from, so compatibility is rarely an issue.
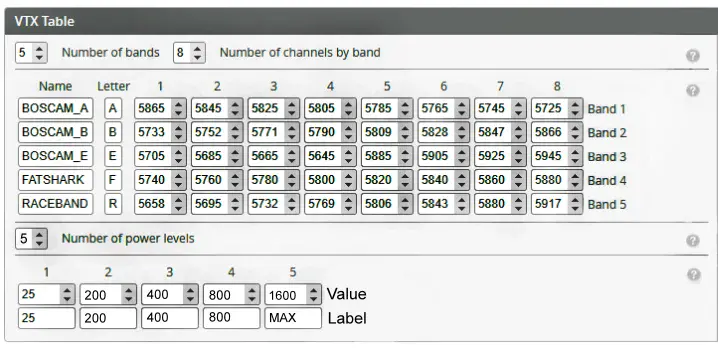
The number of channels becomes more important when several pilots are flying in the same area. Two analog pilots can’t simply use the same channel at the same time because their video signals will interfere with each other. That’s why, during races and group flying sessions, pilots coordinate channel assignments before taking off. With analog FPV, you’ll also often come across Raceband, which was designed specifically with multi-pilot FPV flying in mind. Its channel frequencies are arranged to make it easier for several pilots to fly at the same time while minimizing interference between them.
With digital FPV systems, channels are generally less complicated from the pilot’s perspective. The VTX and goggles usually belong to the same ecosystem, so channel selection is often automatic or greatly simplified. Because of this, the number of available channels is rarely a deciding factor when choosing digital FPV goggles.
In practice, I’d only pay much attention to the channel specifications if you plan to fly regularly with other pilots or participate in FPV racing. Otherwise, it’s one of the least important specs when choosing goggles.
Aspect ratio
Aspect ratio describes the proportions of the image — how wide it is compared with its height. In FPV, you’ll most commonly come across two formats:
- 4:3
- 16:9
Historically, most analog FPV cameras used a 4:3 aspect ratio. The main reason is simple: the pilot can see more of the image above and below. This is especially useful for freestyle and racing, where you often need to quickly judge distances to gates, trees, branches, or other obstacles. A 16:9 aspect ratio gives you a wider view to the sides, but you lose some information at the top and bottom. Because of this, it’s often compared to the image you see on a TV or computer monitor.
Put simply, 4:3 lets you see more sky and ground, while 16:9 lets you see more to the left and right.
Many digital FPV systems, including DJI and Walksnail, use 16:9 by default because it’s better suited to high-resolution video and tends to look more natural for filming and cinematic flying.
So, which one is better? There’s no single answer. If your main goal is racing, freestyle, or flying between obstacles, 4:3 is generally recommended. If you’re more interested in cinematic or long range flying, or simply prioritize the way the image looks, 16:9 is more commonly preferred.
Some goggles allow you to switch between 4:3 and 16:9 modes. However, this switch isn’t always lossless. Some goggles simply crop or stretch the image, so the final result may look worse than the format the system natively supports.
Personally, I wouldn’t choose FPV goggles based on aspect ratio alone. With an analog system, I’d first check the camera’s native aspect ratio and the modes supported by the goggles. With a digital system, I’d usually stick with whichever aspect ratio the FPV system natively outputs.
Niche specs
If you’ve made it this far, I think you already know more than you really need to. From here on, we’re getting into specs that most pilots will probably never need. So, if you’re choosing your first FPV goggles, you can probably skip this entire section. For most pilots, it’s enough to know which type of goggles feels comfortable, what kind of display they use, whether they fit your eyes, and how much they cost.
Buuuut… if you already know exactly what you want from your goggles and you find it among the specs below — be my guest. In certain situations, these features can be exactly what makes you choose one model over another.
USB-C
USB-C on FPV goggles surprised me. Not because the port is rare, but because its capabilities are usually so underused. In most cases, USB-C is used only to charge the built-in battery or power the goggles from a power bank, computer, or another USB power source.
Considering how much USB-C is capable of, I expected to see a lot more. For example, the ability to receive video (video-in), output video (video-out), or even carry both power and video over a single cable. However, I haven’t come across many FPV goggles that take advantage of these capabilities. A few FatShark models, for example, support video-out through USB-C.
Personally, I find it strange that we still don’t have many goggles that take full advantage of USB-C. Imagine this: one cable connected to your computer, providing both power to the goggles and video from the simulator. For now, that’s more of a future wish than reality. Actually, while writing this, I started dreaming — how cool would it be if my DJI Goggles 3 got a firmware update that enabled all of this?
HDMI output
This is a genuinely rare feature. I’m still not sure how useful it would be for me personally. The first use that comes to mind is sharing your live FPV feed with a friend by connecting the goggles to a monitor or TV. In practice, though, that friend would need to bring an extra display or stay next to your equipment the entire time.
However… there’s probably some use for this port that I simply haven’t discovered yet. Still, for your first pair of FPV goggles, I very, very much doubt you’ll need it.
AV input
AV input (analog video input) is a feature that’s becoming increasingly rare today, although it was much more relevant when analog systems dominated FPV.
I got into the FPV hobby when digital systems had already captured a significant share of the market, so I didn’t understand the importance of AV input until much later. The main advantage of this connection is that it allows you to connect an external analog video receiver (VRX) or even an entire ground station to your goggles.
Why would you need that? One use is long range flying. Instead of carrying all the antennas on your head, you can use a receiver mounted on a tripod with larger directional antennas and send the video from the ground station to your goggles through an AV cable. Depending on the setup, this can provide better reception and allow you to optimize the antenna system independently of the goggles.
Today, AV input is mostly useful to pilots who already own a substantial amount of analog gear or like experimenting with unconventional setups. If you’re buying your first FPV goggles and don’t have any long range projects in mind, there’s a good chance you’ll never use this feature.
Audio jack (3.5mm)
The functionality of a 3.5 mm audio jack surprised me as well. It turns out that some analog FPV systems can transmit not only video but audio too. With a small microphone on the drone, you can hear the motors, propellers, and other ambient sounds through your goggles.
At first, this might seem like a completely unnecessary feature. However, some pilots apparently value it quite a bit. Hearing the motors can add another layer of immersion, and some pilots also use the sound as another source of information about how the drone is behaving. Others simply get used to flying with motor noise and say that flying without it feels strangely quiet.
However, audio jacks on FPV goggles can serve different purposes. On some models, it’s an audio-out connection that lets you listen to the received audio through headphones or an external speaker. Other models may also offer audio-in, allowing you to connect a microphone directly to the goggles and record your commentary along with the DVR footage.
For content creators, this could be a convenient feature. However, with compact wireless microphones such as the DJI Mic Mini now widely available, a dedicated audio input on FPV goggles is probably much less important than it once was.
Wi-Fi
Wi-Fi is still a fairly rare feature in FPV goggles. Not because it’s useless, but because very few models offer it. At least from what I’ve come across, the main use case is streaming the FPV feed from the goggles to a smartphone or tablet. This allows friends or family members to watch your flight in real time without needing their own FPV goggles.
Still, it’s worth remembering that Wi-Fi isn’t intended to provide the primary video feed for piloting. Streaming video over Wi-Fi introduces additional latency, so the image on the phone or tablet may lag behind what the pilot sees in the goggles. In addition, the receiving device usually needs to stay relatively close to the goggles to maintain a reliable connection.
If your goggles don’t have this feature, you’re not really missing out. Well… unless you enjoy showing off your flights to everyone around you.
Still in production?
I started writing this article in June 2026, and I’m still updating it as new goggles and accessories appear. Some of the goggles mentioned here have already been discontinued, although you can still find them on the used market, in Facebook groups, and in specialized FPV communities.
Just because a model has been discontinued doesn’t necessarily mean it’s bad. Some older FatShark, Skyzone, and other FPV goggles are still being used successfully today. However, when buying discontinued gear, keep in mind that replacement parts may become harder to find and future firmware updates may become less likely.
So, which goggles should you get?
As I was finishing this article and reached this section, I realized that specs are great, but at some point, after learning what all of them mean, you still have to make a decision. If you haven’t already found a favorite pair of FPV goggles that you simply want — how do you choose? I started writing this article in early June, and somehow it’s already mid-July. It took me this long because I wanted to build a solid enough model that I could feed all the manufacturer-provided specifications into it and get a consistent score. That’s how my FPV goggle scoring model was born. (If I haven’t published a proper page explaining it yet, I’ll share the Google Sheets spreadsheet where the model is described.)
About the scoring model
The model uses eight categories, with a maximum total score of 60 points:
- Display — 14 points
- Optics — 10 points
- Video system versatility — 6 points
- Connectivity — 6 points
- Radio flexibility — 5 points
- DVR — 7 points
- Power — 6 points
- Comfort — 6 points
The technical score alone wasn’t enough. Two pairs of goggles can earn exactly the same number of points while one costs $400 and the other $700. So, in addition to scoring the technical specifications, I added a separate five-star rating for how much value the goggles provide for the money.
Finally, I had to dig through manufacturers’ Facebook pages and news releases to figure out when each model was released. I included the release date because it provides some useful context when comparing older and newer goggles. Newer hardware may have a longer support life ahead of it, although the release date obviously doesn’t guarantee how long a manufacturer will continue providing firmware updates.
The Skyzone SKY04X PRO are a good example of why firmware support can matter. Many reviews have described them as one of the strongest options among analog FPV goggles. However, in February 2026, Nils Vo published a highly critical video about them. Then, on April 27, he uploaded another video reporting that Skyzone had released a firmware update for the goggles. To me, that’s a good example of why continued manufacturer support can still matter even for an already established product. I doubt the manufacturer would have bothered if the goggles had already been five or six years old and discontinued.
How to choose?
- First, I divided the goggles into groups based on their FPV video system: DJI, Avatar HD, HDZero, analog, and ArtLynk. For example, if you already use or plan to use the DJI system, there’s little reason to compare goggles from the other groups unless you’re considering switching or using multiple FPV video systems.
- Next, decide whether you want box goggles or binocular goggles. After these two steps alone, you’ll have filtered out more than half of the options.
- Finally, narrow down the remaining options according to your budget:
- If budget isn’t a concern, compare the highest-scoring goggles within your chosen category and also consider their release dates. At this point, your scoring model has already narrowed the field down to a relatively small number of highly capable options that should remain relevant for a long time.
- If your budget is tight, set your maximum price first and compare the highest-scoring goggles within that range. The value rating can help here as well. And remember: don’t spend your entire budget on the goggles. Leave some money for better antennas if the ones included by the manufacturer aren’t particularly good.
- Finally, if your budget isn’t particularly restrictive but you still want to squeeze as much as possible out of every dollar, look at the goggles with five stars in the value category.
DJI
DJI has probably done more than any other manufacturer to popularize digital FPV. Its goggles are aimed at pilots who want to worry as little as possible about compatibility: the camera, VTX, and goggles work as a single ecosystem, so in most cases you simply bind the devices and fly.
Buuuut… the DJI system is fairly closed. The goggles don’t support analog systems, replaceable or external VRX modules, or HDMI input — so you can’t use them as a display for an FPV simulator. Because of this, they lose points in my scoring model for versatility and radio flexibility. That doesn’t mean they’re worse goggles; they’re simply designed around a more tightly integrated ecosystem.
If you plan to use only DJI O3 or O4, however, many of these limitations become practically irrelevant. In my comparison, Goggles 3 offer the strongest overall feature set, Goggles 2 provide a strong balance between price and features — especially on the used market — while Goggles N3 are aimed more at pilots who prioritize a lower price and simplicity.
| DJI | Goggles 3 | Goggles 2 | Goggles N3 |
|---|---|---|---|
| Release date | April 2024 | August 2022 | November 2024 |
| Goggle type | Binoculars | Binoculars | Box |
| Overall score | 39/60 | 44/60 | 27/60 |
| Display | 14/14 | 14/14 | 9/14 |
| Optics | 8/10 | 6/10 | 2/10 |
| Video system versatility | 2/6 | 2/6 | 2/6 |
| Connectivity | 0/6 | 1/6 | 0/6 |
| Radio flexibility | 1/5 | 4/5 | 1/5 |
| DVR | 7/7 | 7/7 | 7/7 |
| Power | 4/6 | 5/6 | 3/6 |
| Comfort | 3/6 | 5/6 | 3/6 |
| Price in September 2026* | $690 | $240 | $229 |
| Value for money | ★☆☆☆☆ | ★★★★★ | ★★★★☆ |
| URL | URL | URL | URL |
Link to the full table with FPV goggle specifications:
Avatar HD
Walksnail Avatar HD currently offers one of the widest selections of goggles among the digital FPV systems I compared. In my scoring model, Walksnail Goggles X received the highest technical score. They stand out for their wide range of connectivity options, strong optics score, and one of the most versatile feature sets in the Walksnail goggle lineup. If your budget allows it, Goggles X are one of the strongest options in this category according to my scoring model.
Recon HD and Goggles L, meanwhile, are aimed at pilots looking to spend less. Although their technical feature sets are more limited, they scored competitively in my value-for-money rating. Dominator HD remain capable goggles, but their age is becoming increasingly apparent when you compare their features and connectivity with newer models.
| Model | Walksnail Goggles X | Dominator HD | Walksnail Goggles L | Recon HD |
|---|---|---|---|---|
| Manufacturer | Caddx | Fatshark | Caddx | Fatshark |
| Release date | October 2023 | May 2022 | July 2024 | November 2022 |
| Goggle type | Binoculars | Binoculars | Box | Box |
| Overall score | 51/60 | 34/60 | 26/60 | 27/60 |
| Display | 13/14 | 11/14 | 8/14 | 8/14 |
| Optics | 9/10 | 5/10 | 3/10 | 4/10 |
| Video system versatility | 4/6 | 2/6 | 2/6 | 2/6 |
| Connectivity | 5/6 | 1/6 | 0/6 | 1/6 |
| Radio flexibility | 5/5 | 5/5 | 0/5 | 2/5 |
| DVR | 6/7 | 2/7 | 6/7 | 2/7 |
| Power | 4/6 | 4/6 | 4/6 | 4/6 |
| Comfort | 5/6 | 4/6 | 3/6 | 4/6 |
| Price in September 2026* | $459 | $380 | $200 | $190 |
| Value for money | ★★★★☆ | ★★★☆☆ | ★★★★☆ | ★★★★★ |
| URL | URL | URL | URL | URL |
Link to the full table with FPV goggle specifications:
HDZero
The HDZero goggle lineup struck me as one of the most consistent among the manufacturers I looked at. Even the less expensive models retain many of the system’s important features, while the flagship HDZero Goggle 2 offers a particularly wide range of connectivity and compatibility options. If using several different FPV video systems with a single pair of goggles is important to you, that flexibility is one of HDZero’s biggest strengths.
By the way, at the “Vilnius kyla 2026” drone race on July 18, 2026, I paid attention to which goggles the pilots were using. Unless I’m remembering incorrectly, roughly 7 out of 10 appeared to be flying with HDZero Goggle 2.
Lorem ipsum
| Model | Goggle | BoxPro/ BoxPro+ | Transporter II HD |
|---|---|---|---|
| Manufacturer | HDZero | HDZero | EMAX |
| Release date | July 2025 | February 2025 | December 2022 |
| Goggle type | Binoculars | Box | Box |
| Overall score | 52/60 | 44/60 | 19/60 |
| Display | 13/14 | 10/14 | 5/14 |
| Optics | 8/10 | 3/10 | 0/10 |
| Video system versatility | 6/6 | 6/6 | 2/6 |
| Connectivity | 5/6 | 5/6 | 0/6 |
| Radio flexibility | 5/5 | 5/5 | 4/5 |
| DVR | 6/7 | 6/7 | 2/7 |
| Power | 4/6 | 4/6 | 3/6 |
| Comfort | 5/6 | 5/6 | 3/6 |
| Price in September 2026* | $570 | $310 | $210 |
| Value for money | ★★★☆☆ | ★★★★★ | ★★☆☆☆ |
| URL | URL | URL | URL |
Link to the full table with FPV goggle specifications:
Analog box goggles
As I mentioned earlier, box goggles are generally considered a beginner-friendly option. However, some models come surprisingly close to binocular goggles in terms of specifications and features.
In fact, they have some advantages of their own: a larger display, simpler operation, often a built-in battery — which can be useful for beginners who don’t yet have a pile of drone batteries lying around — and, of course, a lower price. In my scoring model, the HDZero BoxPro+ clearly stands out, with technical capabilities that come close to some binocular goggles. Among analog models, the Skyzone Cobra X V4 performed particularly well, while pilots looking to get as much as possible for as little money as possible should also consider the Cobra SD, EV800DM, or FatShark Echo. Although their technical scores are lower than those of premium models, they still offer very good value for the money.
What’s interesting is that models such as the HDZero BoxPro+ and Skyzone Cobra X V4 show that box goggles can still be highly capable. If you prefer a larger display over a more compact form factor, there’s no reason to assume that box goggles are something you’ll necessarily need to replace as you progress in the hobby.

Link to the full table with FPV goggle specifications:
Analog binocular goggles
Analog binocular goggles are one of the most mature categories of FPV gear. Although most models display the same analog video signal, the goggles themselves can differ significantly. Display technology, optics, FOV, DVR capabilities, HDMI connectivity, and replaceable VRX modules can have a greater impact on the overall user experience than the analog video system itself.
In my scoring model, HDZero Goggle 2 takes the clear lead. However, among goggles designed primarily for analog FPV, Orqa FPV.One Pilot, Skyzone SKY04X PRO, and FatShark HDO+ also performed particularly well. On the other hand, if your budget is limited, even older models can be an excellent option — especially if you invest some of the money you save in quality antennas or a better internal analog VRX module.
Even though I’m trying to be as objective as possible here, I have to mention that I don’t recommend the Eachine EV100 goggles because of their extremely narrow 28° FOV. I included them to make sure the comparison covers as many available goggles as possible, but unfortunately, I can’t recommend them even at their substantially lower price.

Link to the full table with FPV goggle specifications:
Artosyn/ArtLynk
For now, this category is pretty simple. For ArtLynk, I was only able to find one goggle model: the BetaFPV VR04 HD, available in standard and Pro versions. There’s also the Walksnail Ascent HD, based on an Artosyn chipset and designed for the Walksnail Ascent system. However, I can’t directly compare it with the BetaFPV goggles because their VTXs aren’t cross-compatible.
Manufacturers provide relatively little information about the specifications of these systems. However, since each effectively has only one native goggle option in the products I found, I haven’t included them in my comparison tables. If you want to use either digital FPV system with its native goggles, there isn’t much to compare. On the other hand, if you don’t mind adding roughly 80 g of extra weight, you can choose from goggles with HDMI input and use a compatible external VRX instead.
What do I use?
My first FPV goggles
I started with one of the simplest options — the BetaFPV VR02, which I found on the used market for just €30.
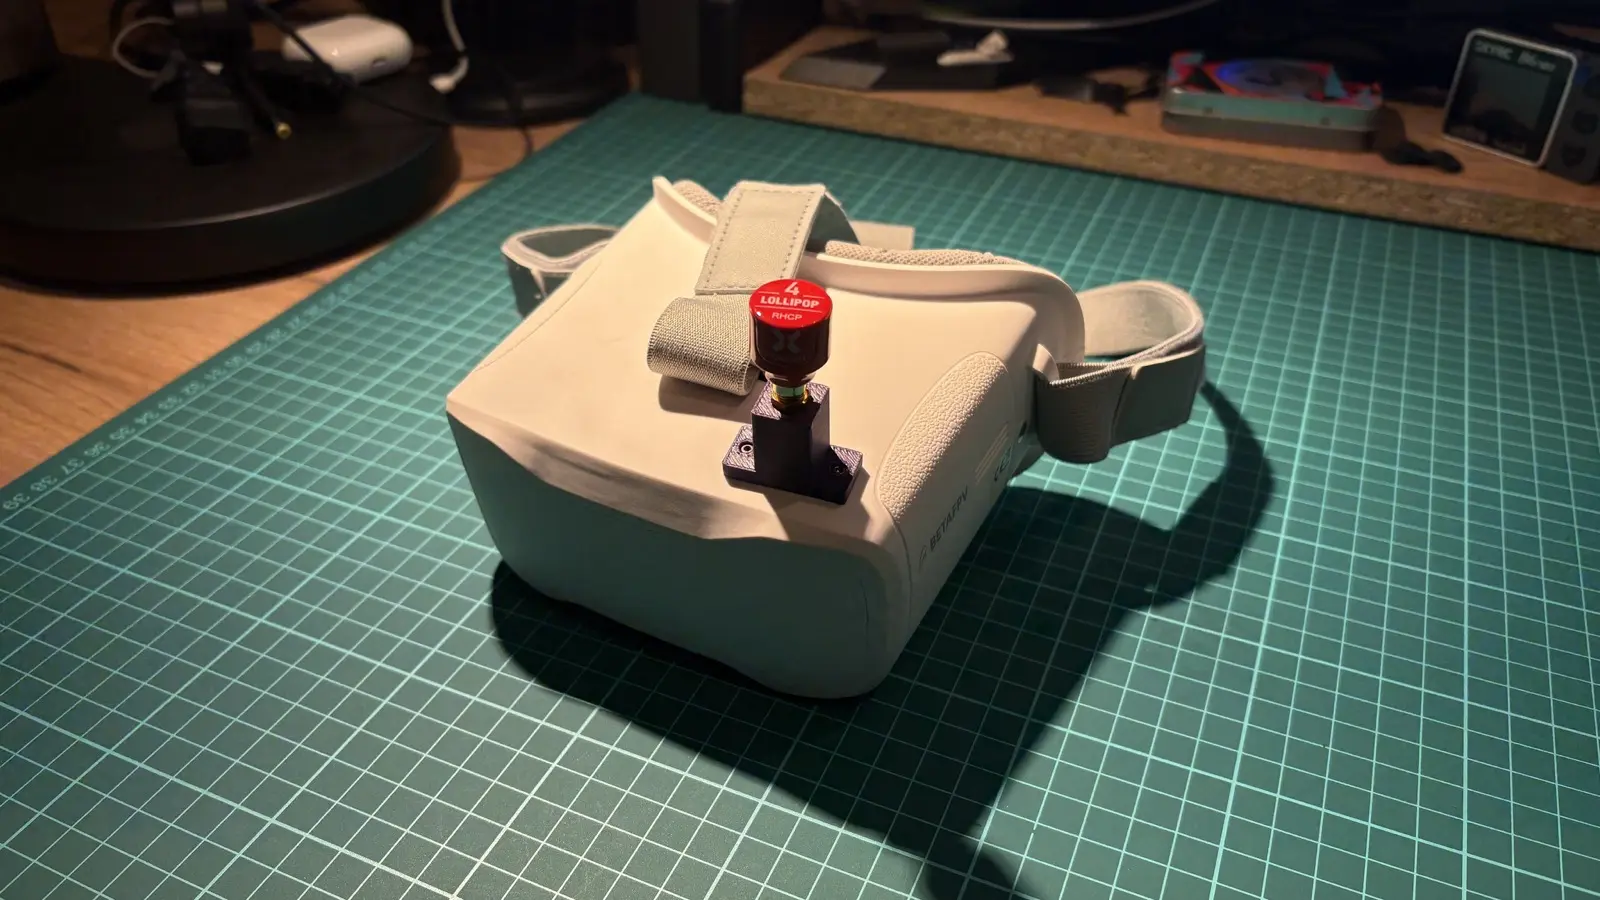
The goggles are extremely basic and don’t have any particularly impressive specs. However, when I first started flying FPV with a tinywhoop, they were more than enough. I rarely fly with them these days, but they still aren’t gathering dust in a drawer. Whenever I need to quickly check the camera on a freshly soldered drone, the OSD menu, or something similar, they still come in handy.
By the way, in the photo you can also see an extra antenna I added to them. I saw somewhere on YouTube that other pilots were modding these goggles, so… why not?
And although I just said there’s nothing particularly impressive about their specs, Nils Vo has mentioned the BetaFPV VR02, VR03, and VR04 as extremely cheap goggles with very low latency. Once again, that shows that very cheap gear isn’t necessarily bad — sometimes it simply lacks the extra features.
My first digital FPV goggles
Next came a strong urge to try a digital FPV system. That’s how I ended up with a DJI Avata 2 kit and DJI Goggles 3.
That first flight was one of those moments when you immediately understand why digital FPV systems became so popular in just a few years. After flying analog, the image looked incredible — sharp, detailed, and colorful. For the first time, I could not only pilot the drone but actually enjoy looking at the scenery.
Another thing I really liked was that everything just worked. Binding — both with the Avata 2 and the O4 Air Unit Pro — firmware updates, settings… everything was considerably simpler than what I’d become used to in the FPV world.
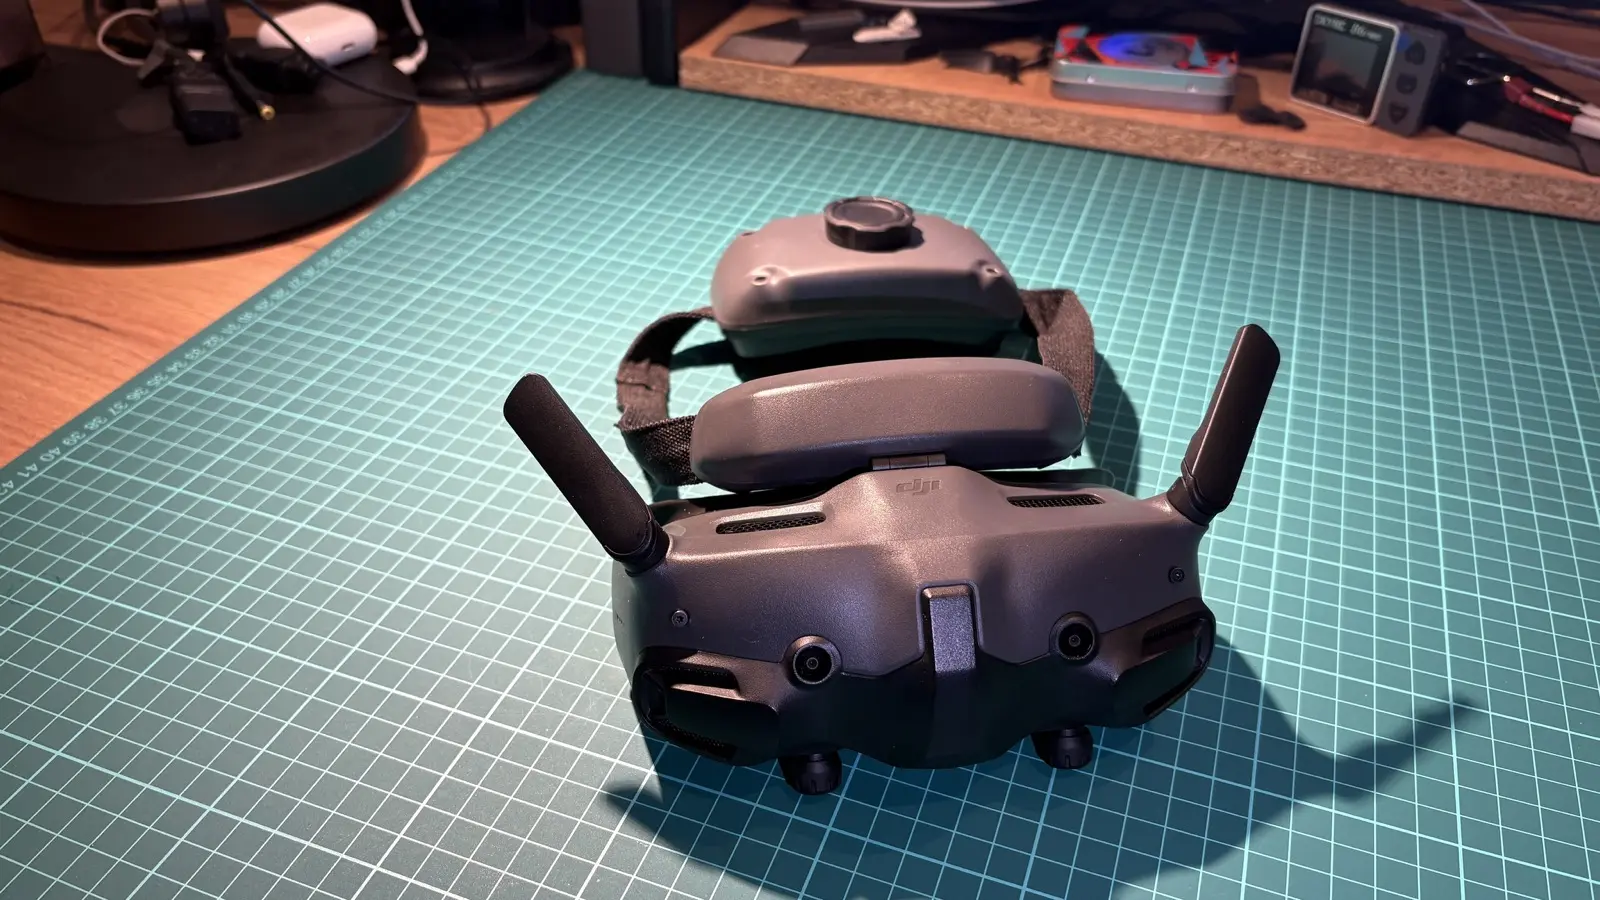
Another feature I found surprisingly useful is the ability to replay the final moments of a flight (last 30 seconds). Why is that useful? If the drone crashes, I can replay those final seconds and get a much better idea of where it went down. After building my first 5-inch freestyle drone with an O4 system, I took it out without a beeper — a small device that makes a loud sound and can be heard from quite a distance. I then managed to disarm the drone in mid-air over a huge grain field. Don’t ask how or why. Being able to replay those final seconds narrowed the search area considerably. Instead of wandering around the field for several hours, I found the drone much faster.
My first serious analog goggles
I was still using the BetaFPV goggles for my analog drones, but after getting familiar with DJI Goggles 3, I realized that, even from a comfort perspective alone, I wanted to replace my box goggles with binocular goggles. By that point, I was also really missing DVR and HDMI input for simulators.
Choosing wasn’t easy at all — I hadn’t yet built my spreadsheet comparing all the different goggles. However, in the many YouTube reviews I watched at the time, the Skyzone SKY04X PRO received a huge amount of praise and was often described as one of the best options in the analog goggle category.
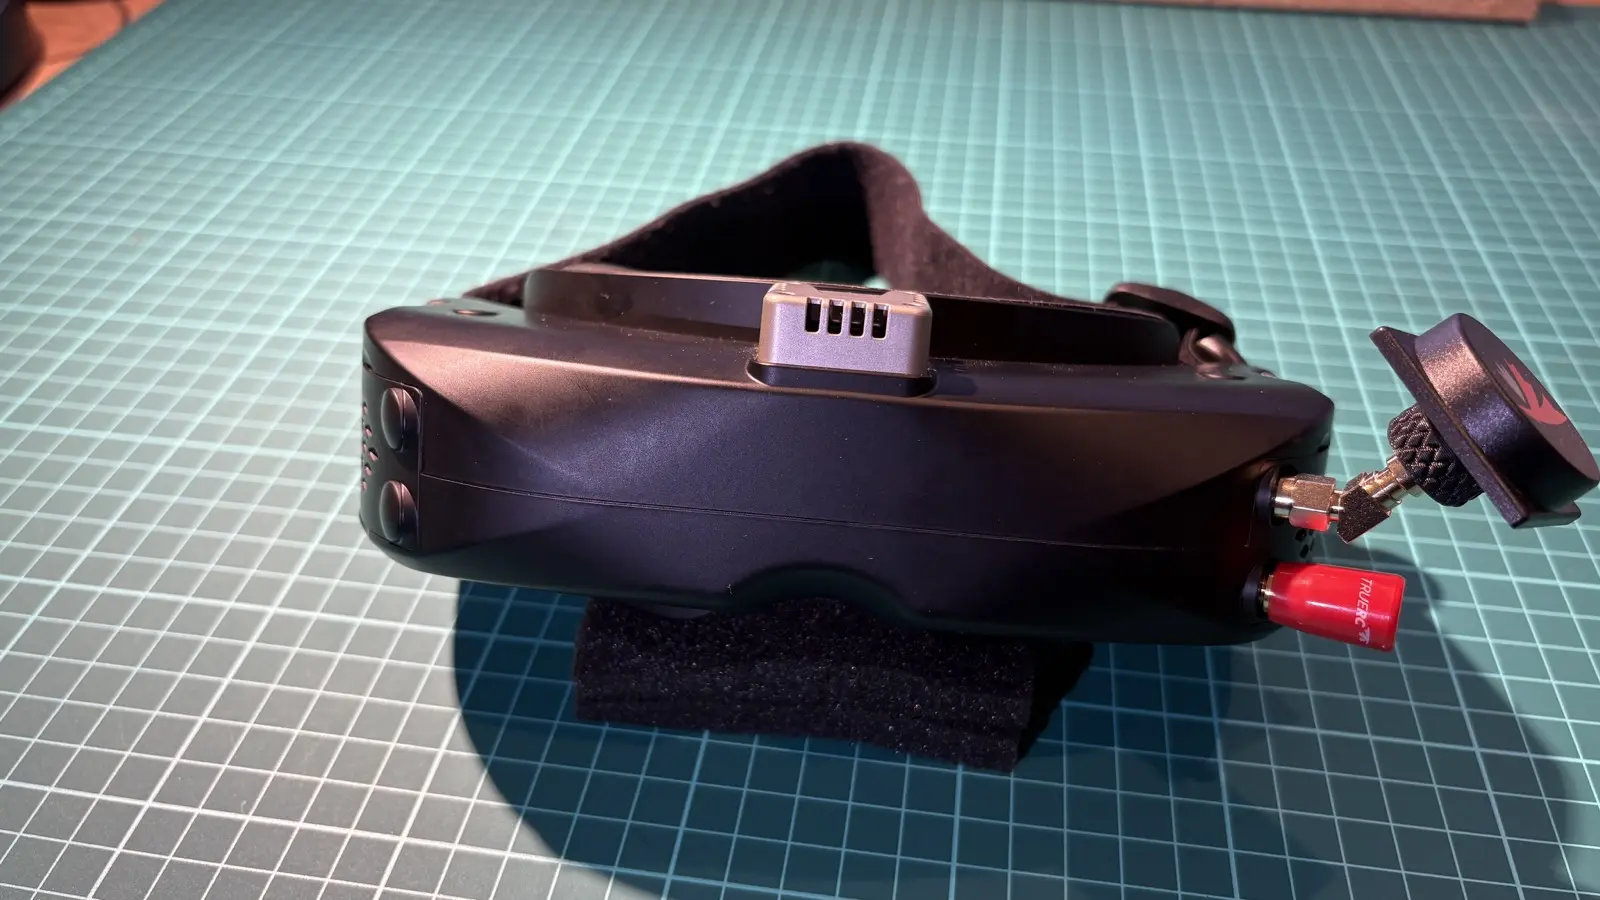
And I can confirm that I wasn’t disappointed. Flying both analog drones and FPV simulators with them is a pleasure. The image is clear, the goggles are comfortable, and all the features I had been missing were finally in one place.
The downsides I’d point out are the slightly oversized FOV and a head strap that feels a little too narrow. My head isn’t particularly large, but after longer flying sessions it can start to hurt a bit. Skyzone could also improve the menu controls. A single 5D button would be much easier to use than two regular buttons and two rotary controls.
If I had to start all over again today, I’d probably follow a very similar path. Cheap analog goggles allowed me to figure out whether I actually enjoyed the FPV hobby in the first place. DJI Goggles 3 opened the door to the digital world, while the Skyzone SKY04X PRO are still my main analog goggles today. Will I eventually replace them with HDZero Goggle 2 and an analog module, or something similar? Probably. However, for now, the SKY04X PRO completely meet my needs when flying analog drones.
Leave a Reply