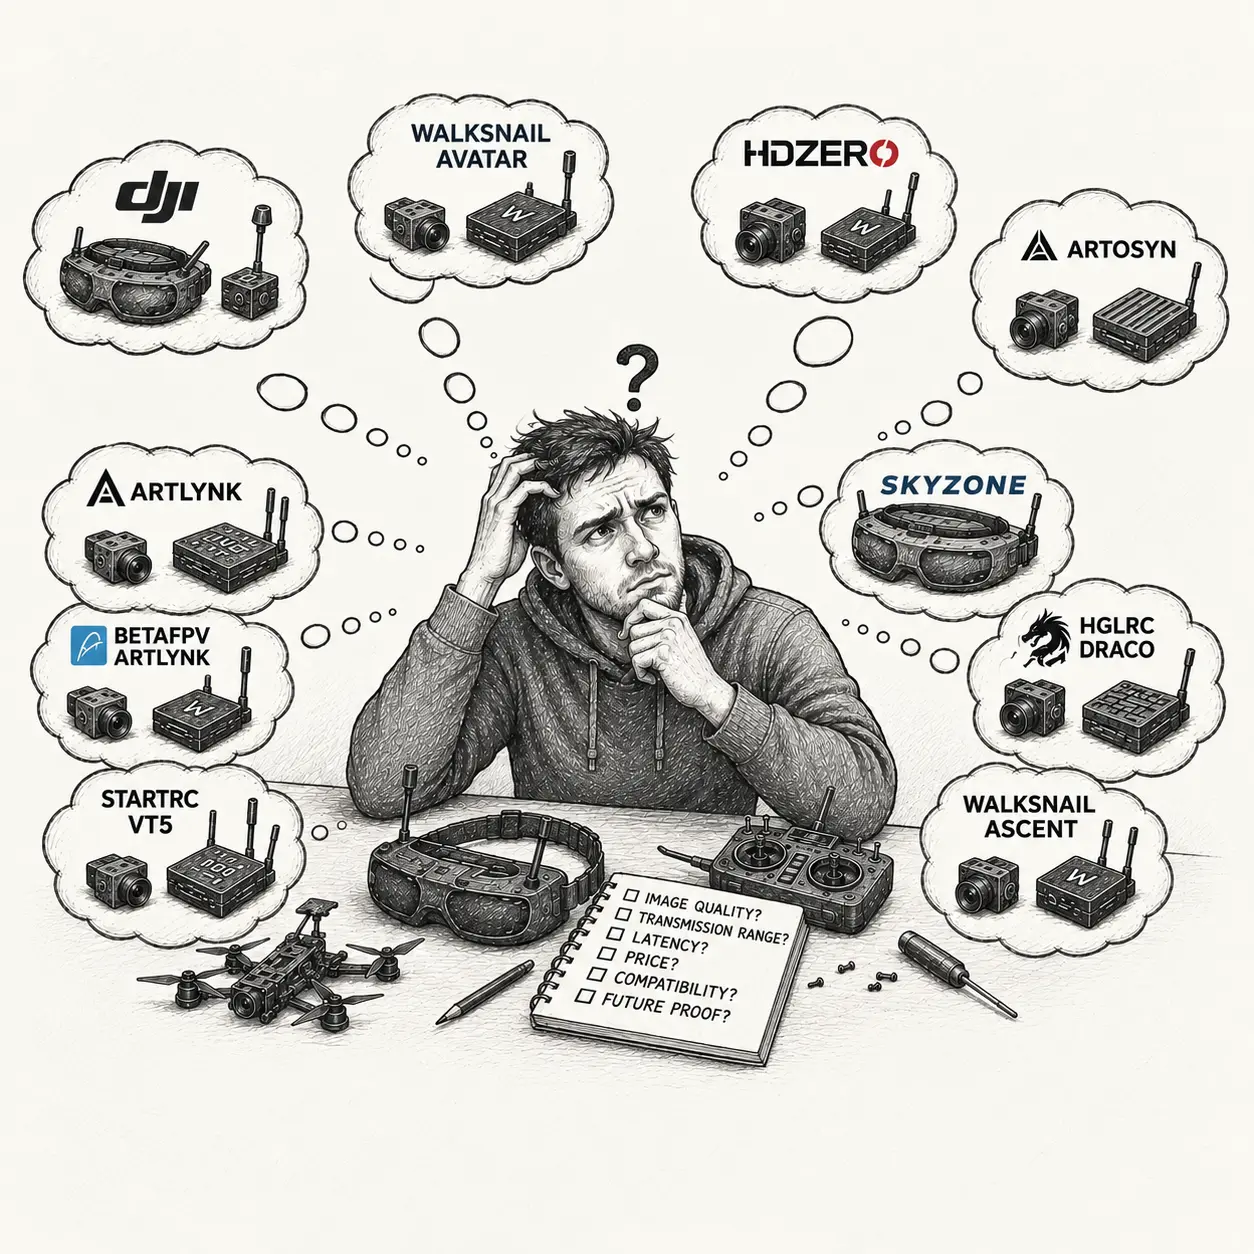
I was planning to write about FPV goggles, but then I realized that before choosing goggles, you first need to choose a FPV video system, as that will determine which goggle models you’ll be able to choose from.
As is often the case in life, the FPV hobby is full of compromises. There is no perfect FPV video system. Better image quality can mean higher latency. Longer range can mean a higher price. A wider camera field of view gives you greater visibility but makes it harder to judge distances.
In this guide, I’ll compare analog FPV with the major digital FPV video systems, including DJI, Walksnail Avatar, HDZero, ArtLynk, and several newer alternatives.
So before I start writing about specific systems, I’ll spend a little time explaining what each parameter actually means, so that when you’re reading system specifications, all those numbers don’t look like just another collection of marketing tricks.
Disclaimer
Technology keeps evolving, so some of the numbers listed in the specifications may have changed by the time you read this article. This article was originally published in June 2026. Prices are taken from the manufacturers’ websites (on September 2026).
Table of Contents
Abbreviations used
- DVR – Digital Video Recording
- FOV – Field of View
- FPS – Frames Per Second
- VRX – Video Receiver
- VTX – Video Transmitter
What makes up a FPV video system?
A FPV video system usually consists of three main components:
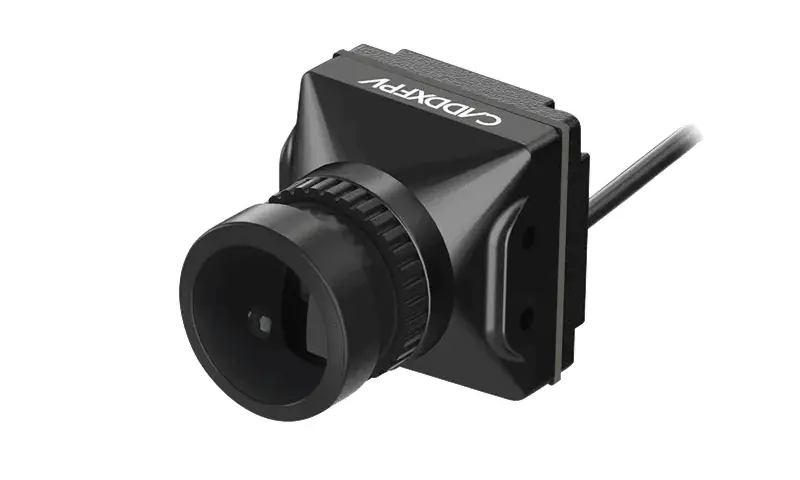
- A camera that captures the video
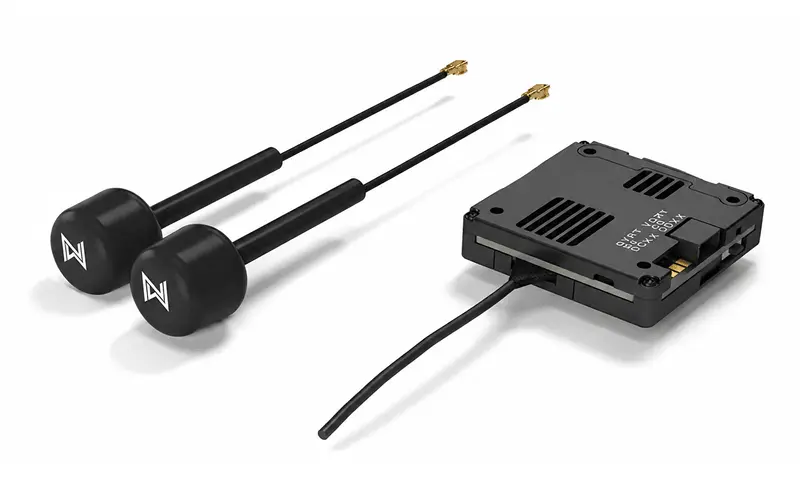
- A VTX with an antenna
- Goggles that act as the VRX
There are two types of FPV video systems: analog and digital.
While things are fairly simple with analog, digital is a completely different story. There is more than one digital FPV video system, and from what I’ve been seeing, their number is gradually increasing.
Currently, the most popular digital systems are:
- DJI
- Walksnail Avatar (from Caddx)
- HDZero
And then there are the newer ones:
- ArtLynk (from BetaFPV)
- SteadyDigital (from Skyzone)
- Draco (from HGLRC)
- VT5 (from StartRC)
- Walksnail Ascent (from Caddx),
- OpenIPC/Ruby HD (many manufacturers)
The newer FPV video systems are interesting because some are significantly cheaper than the popular systems (although they also fall considerably behind in terms of capabilities), while others are open-source (which ultimately also results in lower prices, since they can be manufactured by more than one company).
But let’s go through everything in order.
FPV camera
Video transmitter (VTX)
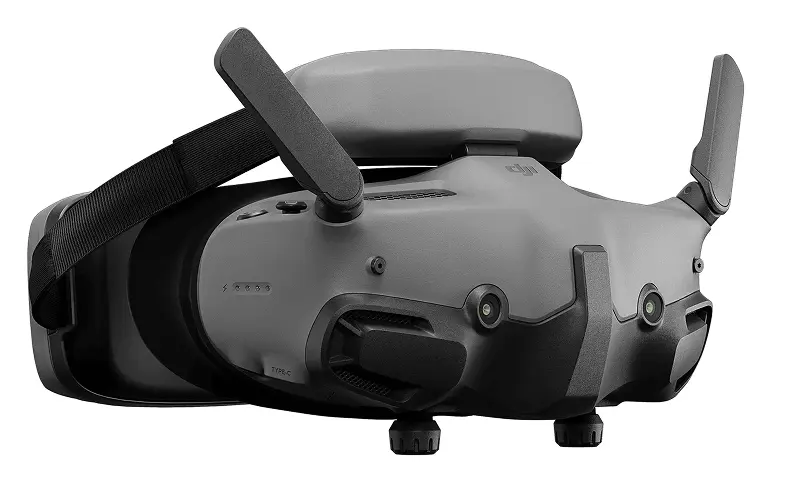
Video receiver (goggles)
What parameters matter when choosing a FPV video system?
In practice, most FPV pilots choose a FPV video system based on five main factors: image quality, range, latency, price, and compatibility with the equipment they already own.
FPV video modes:
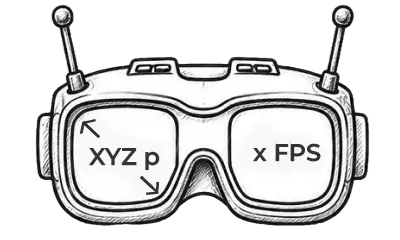
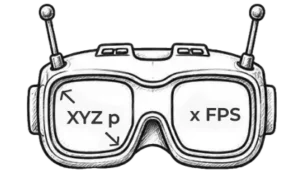
The video mode determines the resolution and frame rate at which video is transmitted from the drone to the goggles. For example, 1080p@100fps (resolution: 1920 × 1080 pixels and 100 frames per second), 1080p@60fps, or 720p@120fps (resolution: 1280 × 720 pixels and 120 frames per second).
Higher resolution means a sharper image, while higher FPS usually means smoother video and, in some FPV video systems, lower latency as well. Freestyle and racing pilots tend to prefer modes with higher FPS, while cinematic pilots are more likely to prioritize image quality — in other words, higher resolution.
By the way, some digital VTX systems can record video to an SD card at a much higher quality than the video being transmitted to the goggles in real time (for example, 4K@60fps). When comparing the FPS of different FPV video systems, I’ll be referring to the real-time video mode transmitted from the VTX to the goggles or VRX.
Range:
As distance increases, the signal becomes weaker. This parameter indicates the maximum distance at which a stable video signal can be maintained. But there’s a big catch: manufacturers specify ranges measured under ideal conditions.
Ideal conditions mean that there are no objects or obstacles in the signal path between the VTX antenna and the FPV goggles antenna — no trees, buildings, or other sources of radio interference.
The ranges advertised by manufacturers are usually achievable only with a clear line of sight. For example, you might achieve them when flying from a high mountain or tower in a direction with no obstacles. There is more than one story of a pilot standing at the foot of a mountain, flying the drone above the summit, and then continuing beyond line of sight (behind the mountain) — losing the signal and the drone along with it.
VTX power:
Increasing VTX transmission power provides a more stable signal, better penetration through obstacles, and greater range between the drone and the pilot. Just keep in mind that doubling the power does not double the range.
It’s also worth knowing that VTX systems usually operate in the 5.8 GHz frequency band. In the European Union, a maximum power limit of 25 mW applies (ETSI EN 300 440). In the U.S., the limit is 1 W for pilots without an additional license.
Sometimes power is expressed in dBm (decibel-milliwatts), a logarithmic unit that measures power relative to 1 milliwatt (mW). Doubling the power increases the value by approximately 3 dB:
| Power | dBm |
|---|---|
| 25 mW | 14 dBm |
| 200 mW | 23 dBm |
| 500 mW | 27 dBm |
| 1000 mW (1 W) | 30 dBm |
| 2000 mW (2 W) | 33 dBm |
Latency:
It takes time for a video frame to travel from the camera to the FPV goggles. Although this delay is measured in milliseconds, it can have a significant impact. For example, if a drone is flying at 60 mph and the FPV video system has 50 ms of latency, then from the moment the image enters the camera until it reaches your goggles — the so-called glass-to-glass latency — the drone has already traveled about 50 inches.
And that’s before taking into account the delay between the moment the pilot reacts by moving a controller stick and the control signal reaching the drone. With high overall latency, by the time you see an obstacle and try to avoid it, the drone may already have hit it. When comparing FPV video systems, I’ll provide glass-to-glass latency values.
Lower latency means more precise control and the ability to fly closer to objects. Higher latency means that, in reality, the drone has already traveled slightly farther than what you see in the goggles. During aggressive flying, this can mean more frequent crashes.
Nils Vo has a good video that explains the impact of latency very well.
For reference, below are some more examples showing how different drone speeds, latency values, and the distance traveled by the drone during that latency are related.
| Latency | 20mph | 40mph | 60mph |
|---|---|---|---|
| 6ms | 2.1 in | 4.2 in | 6.3 in |
| 12ms | 4.2 in | 8.4 in | 12.7 in |
| 24ms | 8.4 in | 16.9 in | 25.3 in |
| 48ms | 16.9 in | 33.8 in | 50.7 in |
Number of FPV video channels:
This is the number of available frequencies (also called channels) on which the VTX can operate. Beginners usually fly alone, so the number of channels isn’t particularly important. However, if there are other pilots flying nearby, it becomes especially important because more than one pilot cannot use the same channel at the same time without causing severe interference.
When I meet up with friends for some racing, we always decide who will use which frequency (channel) before we start flying.
Camera FOV:
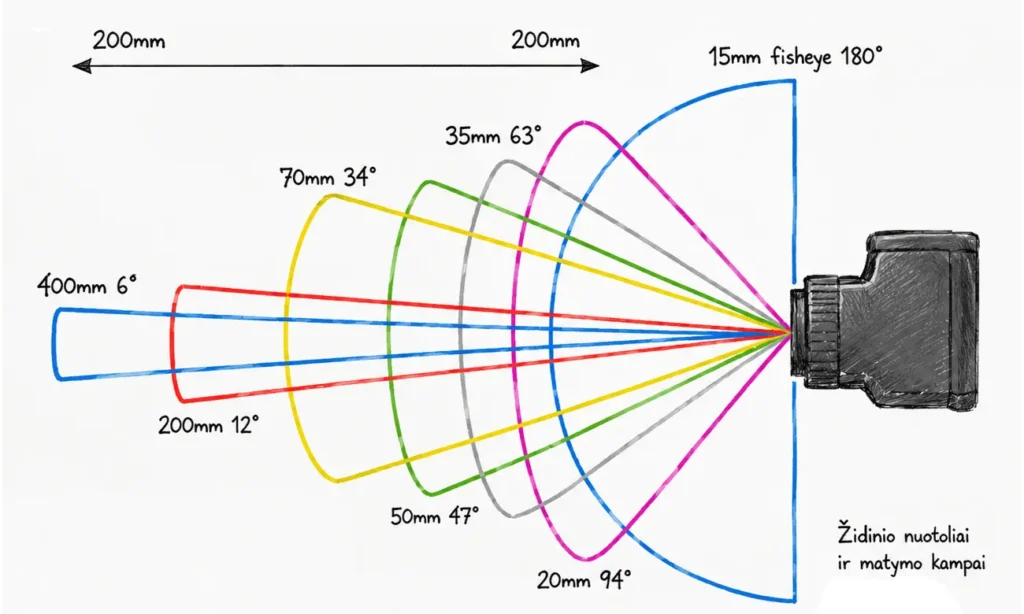
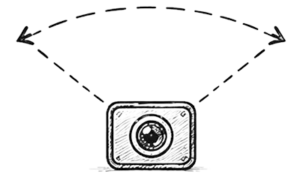
When talking about FPV video systems or VTXs, FOV refers to the camera’s field of view (because FPV goggles also have their own FOV). It is a camera parameter measured in degrees (°). Simply put, it is the camera’s viewing angle — how much of the scene the camera can capture at once.
The larger the FOV, the more of your surroundings you can see at the same time. However, as FOV increases, you also get more of a fisheye effect, where objects near the edges of the image appear curved. For example, when looking at the horizon from a drone, instead of seeing a straight line, you may see a curved one. When taking photos with a camera or drone, this effect can be corrected in photo-editing software such as Photoshop.
The key thing is that a larger FOV means the objects you see appear smaller and farther away than they really are. Conversely, a smaller FOV makes objects appear larger and closer than they actually are.
There are quite a few posts on FPV forums from pilots who switched to cameras with a significantly different FOV and crashed during their first few flights because they had developed a different perception of distance and their surroundings with their previous cameras.
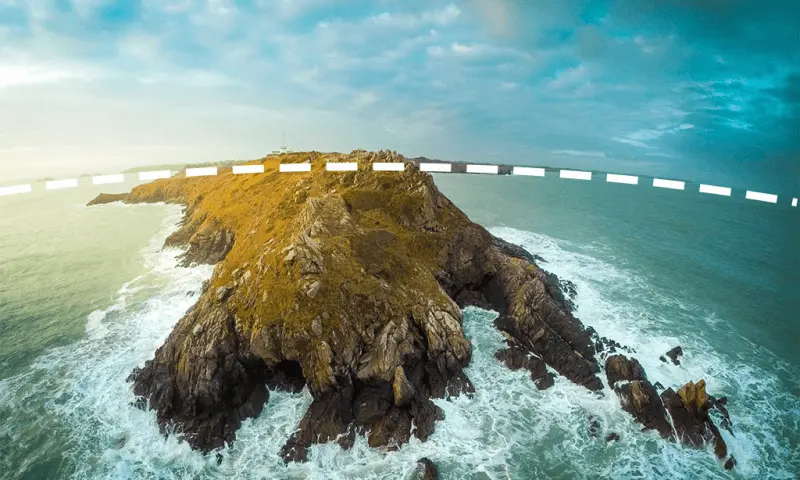
Source: https://photovideocreative.com
Analog FPV video systems
This is where it all started — analog is the oldest FPV video system. Unlike digital systems, analog systems send the video from the camera directly to the VTX, which then transmits it through the antenna without any additional processing. As a result, any analog video receiver nearby can receive the signal and display it on a screen.
At FPV races that use analog video systems, spectators with their own video receivers only need to switch between channels to watch the video feeds from different drones and pilots.
Personally, this is one of the things I find most appealing about analog systems. When I meet up with friends, I can hand out the cheap analog FPV goggles I have, and they can watch my flights as well. You can also buy small 5–7-inch screens for watching FPV pilots fly. Some of them even have a DVR function.
Biggest advantages of analog FPV
- Low price — well, unless you choose a camera with better image quality at night, such as the Caddx Ratel Pro,
- The lowest video latency — because the video from the camera does not need to be additionally encoded,
- Predictable signal degradation — as the drone gets farther away from the pilot or obstacles appear between them, the image gradually starts to develop “snow,” much like searching for channels on an old analog TV. This also serves as a warning that the signal quality is getting worse. Digital systems often behave differently — something closer to “all or nothing.” The image can remain excellent for a long time, but once you reach the limit, it may suddenly break up into pixels or disappear completely
- Low weight and low power consumption — this is especially important when building tinywhoops, where every gram you can save matters.
Biggest disadvantage of analog FPV
- Image quality — the video looks like a TV broadcast from the ’90s TV viewed on an old analog television. With image quality like this, it’s harder to attract other people to the hobby or show them what makes the hobby so great
Because analog system components can be made by virtually any manufacturer, this is also where you’ll find the greatest selection. There is a huge range of cameras and VTXs to choose from, so when building almost any type of drone, you can find plenty of suitable components. And because analog remains popular even today, it is unlikely that this FPV video system will disappear anytime soon.
Because there are so many different components, it doesn’t really make much sense to try to define specific parameter values for analog systems. At most, we can talk about their typical ranges:
Video modes
• 720×576@25fps (PAL mode)
• 720×480@30fps (NTSC mode)
Range
From a few hundred feet to dozens of miles, depending on the VTX power, the characteristics and quality of the antennas being used, and environmental conditions
VTX power
Most frequent 25 mW, 100 mW, 200 mW, 400 mW, 800 mW, 1 W, 1.6 W, 2.5 W or even more. Analog systems offer the widest selection of VTXs on the market.
Latency
Approx. 10–15 ms (glass-to-glass), depending on the camera and FPV goggles being used.
Number of channels
Usually 40 channels (5 frequency bands × 8 channels). Some VTXs support even more channels (e.g. Foxeer Reaper Infinity VTX – as many as 80 channels) or additional Low Band frequencies.
Digital FPV video systems
Digital FPV video systems perform an additional step before transmitting the video signal through the antenna — they digitize the video. Thanks to the ability to use more advanced cameras, this takes us into the world of high-resolution video.
When listing the current price, I include the price of the complete kit: camera + VTX + antenna(s).
DJI FPV video system
For those whose main priority is image quality, DJI usually ends up at the top of the list. This FPV video system is especially popular among cinematic and freestyle pilots who need to clearly see small obstacles and fly in complex environments. However, this comes at a higher price — both literally and in terms of being tied to the DJI ecosystem, since DJI VTX modules only work with DJI goggles.
In my opinion, one of DJI’s biggest disadvantages is compatibility. Not all DJI VTX modules work with all DJI goggle models, and some features are only available when using the latest-generation equipment. So before buying, it’s worth checking the compatibility charts.
At the beginning of 2025, DJI introduced the O4 Air Unit and O4 Air Unit Pro systems, followed by the O4 Wide Air Unit in June 2026. The manufacturer-claimed latency of just 15 ms is impressive, especially considering the quality of the transmitted video. Still, DJI remains one of the most expensive FPV video systems on the market, so it won’t make sense for every pilot.
Video modes
1080p@ 30/50/60/100fps,
(Pro includes 48fps)
Range
10km;
15km (PRO);
VTX power
CE mode: 25mW.
FCC mode: 25mW-1.200mW
Latency
When DJI Goggles 3 is used: 20ms, 15ms (PRO)
Number of channels
1-3
Racing mode: 2 (CE), 8 (FCC)
FOV
117.6º
155º (Pro)
159º (Wide)

Price (2026 Sept.)
109$
229$ (PRO)

Walksnail Avatar FPV system
Walksnail Avatar from Caddx is often considered the main alternative to DJI. Its image quality is not far behind many DJI solutions, while offering more flexibility when choosing equipment. The FPV video system has a very wide selection of VTXs, making it suitable for virtually any build — from extremely small options for tinywhoops to more powerful modules for larger freestyle or long range drones.
One of Walksnail’s main advantages over DJI is compatibility between different generations of equipment. Although the ecosystem itself is also closed, Caddx makes an effort to support older products for longer. Because of this, many pilots see Walksnail as a compromise between DJI image quality and the flexibility of an analog system.
Walksnail is especially popular among freestyle, cinewhoop, and tinywhoop pilots. While DJI is usually associated with the highest image quality, Walksnail often wins when it comes to the balance between price and capabilities.
For those who want even more flexibility, Caddx also offers a VRX module that can be used with any display device that has an HDMI input. This makes it possible to use any FPV goggles equipped with an HDMI input.
Video modes
1080p@60/100fps
720p@60/100fps
Range
2-20 km
VTX power
CE mode: 25mW.
FCC mode: 25mw-2W
Latency
22ms
HDZero FPV system
I’ve seen HDZero described as “Analog+” somewhere because it manages to maintain extremely low latency similar to analog systems, while at the same time offering some of the image quality benefits of digital video (although not at the same level as other digital FPV video systems). Because of its low latency, the system is popular among FPV racers.
Interestingly, as the signal gets weaker, the HDZero image usually doesn’t break up into large pixels. Instead, more and more noise appears in the image, allowing the pilot to notice the degrading signal earlier. Although HDZero falls behind DJI in terms of image quality, many pilots consider this behavior of the system a major advantage (video).
From what I’ve been able to find out, this is achieved through one-way video transmission: in conventional digital systems, if a frame is lost or corrupted during transmission, the receiver asks for that frame to be retransmitted. With HDZero, the frame is not retransmitted — it is simply lost.
If DJI is usually chosen by cinematic pilots and Walksnail by pilots looking for versatility, HDZero is most often chosen by those who prioritize flight control, fast response, and racing.
In addition to their integrated HDZero VRX, HDZero goggles can also be fitted with a module that supports analog video reception.
Video modes
1080p@30fps
720p@60fps
540p@90fps
Range
up to 7 km
VTX power
CE mode: 25mW.
FCC mode: 25mw-200mW
Latency
14ms
Number of channels
12 (R1-R8, E1, F1, F2, F4)
(+8 if Low Band selected)
FOV
150º-160º depends on selected camera
Price (2026 Sept.)
70-150$
VRX: 220$
New digital FPV video systems
I’m not sure whether it’s entirely correct to call them this, but I refer to these newer systems as budget digital FPV video systems.
The prices of their kits (camera + VTX + antenna) can be several times lower than those of the popular digital systems. Of course, this is reflected in their performance as well — latency, maximum range, and video modes.
However, when you’re just getting started in the hobby and don’t yet need the highest possible performance from your equipment, that kind of price difference can definitely be beneficial.
Artosyn chip-based systems
Artosyn is a Chinese chip design company specializing, among other things, in wireless video processing. Its products are or have been used by industry giants such as DJI, Caddx (the manufacturer of Walksnail), and other drone manufacturers.
Its latest AR803X chip has spawned a whole bunch of new digital FPV video systems. Some of them use ArtLynk software developed by KAP, an Artosyn partner, and after the latest software update, these systems became compatible with one another.
Since the equipment sold to end users is manufactured by several different companies, the system is often referred to as an open platform (not open-source).
BetaFPV ArtLynk FPV system
BetaFPV ArtLynk is a budget digital FPV video system built around the ArtLynk platform. So far, there is only one camera and VTX option: the P1 Air Unit HD VTX, along with two goggle models (VR04 HD and VR04 HD PRO). However, since this is part of the ArtLynk ecosystem, that shouldn’t really be a problem.
The PRO goggles use replaceable antennas — a sign that installing better-quality antennas could also improve the connection with the VTX.
More recently, BetaFPV released the P1 HD VRX (Nano) — a VRX module that can be installed on analog goggles with a compatible module bay. At the time of writing, it is still a beta product, but it could be a very attractive option for pilots who already own analog goggles and want to switch to digital without the high cost of replacing them.
I can’t wait to get my hands on one.
Video modes
1080p@60fps
Range
>5km
VTX power
CE mode: <25mW.
FCC mode: <1W
Latency
60ms
Number of channels
3
FOV
170º
Price (2026 Sept.)
38$, Goggles 149-159$; VRX: 100$; VRX module: 75$
Skyzone SteadyDigital
TSkyzone SteadyDigital is another digital FPV video system based on ArtLynk. Unlike BetaFPV, the Skyzone VTX (S1 PRO) looks more suited to larger drones — rather than being a “bare” VTX board, it comes in a housing with an integrated heatsink for heat dissipation.
The biggest difference is that the VTX comes with two antennas. There are also three different camera options, making the system suitable for a wider range of drone sizes.
There are no dedicated ArtLynk goggles from Skyzone, despite the company being well known for its FPV goggles. However, there is a VRX module (SteadyDigital 10 PRO) with an HDMI output, which means you can use any FPV goggles with an HDMI input. Or, instead of goggles, you could use a monitor, for example.
I saw a YouTube video where the VRX with its antennas was mounted on a tall tripod — presumably a photography tripod — and connected to the goggles with an HDMI cable. I guess others simply 3D-print a mount and attach the VRX directly to their goggles. The VRX also has an SD card slot.
P.S. I just noticed that Skyzone’s website doesn’t show any SteadyDigital products at the moment (September 2026). The original version of this article was published in June 2026. Hopefully they’ll be back in stock soon.
Video modes
1080p@60fps
Range
>>5km
VTX power
CE mode: <25mW.
FCC mode: <1W
Latency
Undisclosed, but I’m guessing 60ms.
Number of channels
19
FOV
150º-160º depends on selected camera
Price (2026 September)
125-159$
VRX: 129$
HGLRC Draco
HGLRC Draco is another digital FPV video system in the ArtLynk ecosystem. It offers a VTX with a choice of two camera models, as well as a VRX. It looks very similar to the Skyzone system.
Video modes
1080p@60fps
Range
approx. 15km
VTX power
CE mode: Undisclosed or none
FCC mode: <2W
Latency
60ms
Number of channels
Undisclosed, but noticed 16+ in one review video
FOV
160º-170º depends on selected camera
Price (2026 Sept.)
150-170$
VRX:150$
STARTRC VT5
The STARTRC VT5 is a digital FPV video system based on Artosyn chips, although it isn’t currently part of the ArtLynk ecosystem. Some long-time FPV pilots and content creators from China speculate that it’s only a matter of time before a firmware update brings it into the ArtLynk ecosystem.
Video modes
1080p@60fps
Range
up to 6km
VTX power
CE mode: Undisclosed or none
FCC mode: up to 300mW
Latency
60ms
Number of channels
3
FOV
160º
Price (2026 Sept.)
Undisclosed, In manufacturer’s Aliexpress profile: approx $230
Walksnail Ascent
Walksnail Ascent isn’t part of the ArtLynk ecosystem either. Although compatibility with ArtLynk is theoretically possible, there isn’t much optimism on internet forums that it will actually happen. And it makes sense — Caddx already has its more advanced Avatar digital system, which isn’t compatible with other systems. No one would be surprised if the same thing happened with Ascent.
Video modes
1080p@60fps
720p@100fps
Range
up to 3km
VTX power
CE mode: <25mW
FCC mode: <100mW
Latency
35ms
OpenIPC/Ruby FPV
I’m including this combination of systems simply so that I can honestly say I’ve mentioned all the FPV video systems.
While Artosyn chip-based systems can be described as an open platform (which people sometimes confuse with open-source systems), the combination of OpenIPC and Ruby FPV is a truly open-source digital FPV video system.
OpenIPC provides the software for IP cameras and video encoding, while Ruby FPV handles the rest, mainly the radio side of the system. If you want to build a working drone with it, you’ll need to be quite familiar with the Linux operating system.
If developing Internet of Things or embedded systems is what gets your motor spinning, this might be the option for you. This definitely isn’t a system you can simply buy, install on a drone, and fly the same evening. You’ll have to put in quite a few hours of work before you get your first drone up and running.
My gut feeling tells me that I’ll end up using it in one of my future projects. If that happens, I’ll definitely write about it.
So, which FPV video system should you choose?
After going through a whole range of FPV video systems, this remains one of the harder questions. Not because there isn’t a clear answer, but because it’s a question you need to answer fairly early in your journey into the FPV hobby..
FPV video systems comparison
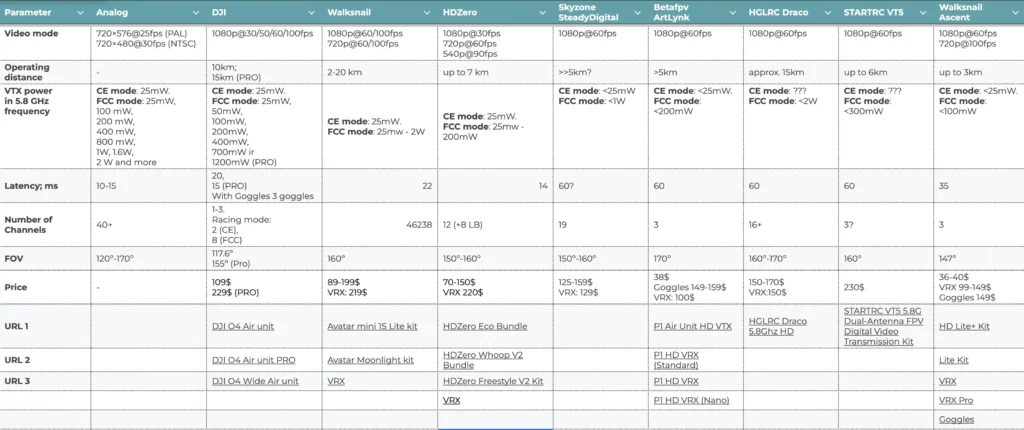
I also keep a Google Sheets database where I compare VTXs and FPV video systems, including their specs, prices, and other useful information. You can find it here: FPV video system comparison spreadsheet.
My initial recommendation is not to rush the decision. Pick one or two simulators you enjoy and put enough flight hours into them first. After a while, you’ll start to understand what type of flying you actually enjoy:
- I’m most drawn to maps with large open spaces, where I dive between mountains, buildings, or other large objects.
- I’m most drawn to maps set in abandoned buildings, where I fly between different rooms, make sharp maneuvers, and squeeze through small windows and gaps.
- I get the biggest adrenaline rush from racing against real opponents or computer-controlled drones, and the maps or tracks themselves don’t really matter to me.
Can you already see where I’m going with this? Option 1 points toward cinematic or long range flying, option 2 toward freestyle, and option 3 toward racing.
The next question — and one that may ultimately determine everything — is your budget:
“Am I planning to have just one drone, or eventually a whole collection of different drones?”
If I want the best image quality, beautiful nature footage, and long range — and budget isn’t a problem
If image quality and maximum range are your priorities, DJI should be your first choice. Just be warned — it won’t be cheap.
If I want a budget FPV video system and freedom of choice
A year ago… I wouldn’t have even blinked before saying that an analog FPV video system was the best choice for anyone looking to keep costs low. And it really is convenient — I have several analog drones, so I can take much of the equipment off one drone and move it to another. The selection of equipment is by far the widest. That applies to both cameras and VTXs. There is also a huge selection of FPV goggles.
There will definitely be flights where one component or another gets smashed. With an analog system, that will be the least painful kind of accident.
Today… with the arrival of Artosyn chips, I’m not so sure anymore. When a camera + VTX + antenna kit costs under $40, I believe we’re going to see some changes in the budget drone market. When a little over $300 gets you a tinywhoop drone, an ExpressLRS controller, and goggles, it’s hard to resist. If I were starting my FPV journey today, I’d recommend BetaFPV ArtLynk to myself.
If I want a versatile system for flying both outdoors and through abandoned buildings — and I hate anything related to DJI
If you want image quality similar to DJI and a versatile selection of equipment, Walksnail Avatar should be your choice. No matter what size drone you’re soldering together, you’ll find a suitable VTX for it. Caddx is also known for listening to the FPV community — something DJI definitely can’t brag about.
Personally, I use DJI and haven’t yet run into compatibility issues between different generations of equipment, but I suspect that’s my ticking time bomb. Walksnail Avatar is significantly ahead in this regard.
If I want to race but also want something better than ‘90s TV
With latency close to that of analog systems, I don’t think I’d be wrong to call HDZero the number one choice for racers.
So, what do I use myself?
As far as my family budget allows, I try to test as wide a range of systems as possible.
- Analog
- Tinywhoops
- 3 inch cinewhoop using GEPRC-Cinelog30 V3 frame
- VTX: SpeedyBee TX800
- Camera: Racecam R1 mini
- Antenna: iFlight Albatross V2 5.8GHz 100mm (RHCP)
- 10 inch long range drone using Mark4-style frame
- VTX: iFlight BLITZ 5.8G 1.6W VTX
- Camera: Caddx Ratel Pro
- Antenna: iFlight Albatross V2 5.8GHz 150mm (RHCP)
- Digital DJI
- 5 inch freestyle drone using GEPRC Vapor-D5 frame
- VTX: O4 Air Unit Pro
- Avata 2
- VTX: Integrated O4 system
- 5 inch freestyle drone using GEPRC Vapor-D5 frame
Whichever FPV video system you choose, remember that you’re not choosing just a VTX and a camera — you’re choosing an ecosystem that will influence your future goggles, drones, and upgrades. That’s why I’d spend a little more time choosing the system than choosing the first drone to install it in.
Sources
- https://fpvwiki.co.uk/artosyn-kap-artlink-digital-fpv-systems-betafpv-artlink-hglrc-draco-skyzone-steadydigital-more
- https://www.etsi.org/deliver/etsi_en/300400_300499/300440/02.02.01_60/en_300440v020201p.pdf
- https://photovideocreative.com/en/fisheye-effect-and-emotions-why-correct-distortion-photo/
- https://support.dji.com/help/content?customId=01700010143&spaceId=17
- https://rubyfpv.com/
- https://github.com/RubyFPV/RubyFPV
- https://docs.hd-zero.com/vtx-summary.html
- https://betaflight.com/docs/wiki/guides/current/VTX
Leave a Reply